Saturday, July 31, 2010

Homemade Bisquick and Fun Pancakes

I'm a big fan of saving money.

I'm also a big fan of making the stuff that I love that keeps my life simple.

So after a few hours of hunting I found a recipe for Homemade Bisquick. Really? Yes! Use just like you would normally use Bisquick recipes.

So keep your recipes, but make your own and save.

Bisquick


8 c of all purpose flour

1 1/4 c Nonfat dry milk powder

1/4 c Baking Powder

1 Tbl salt

2 c Shortening


Mix all the dry ingredients in a large bowl. Cut in the shortening until it resembles course cornmeal. Store in a tightly closed container in a cool dry place. Makes 10 cups.


Next time, have some fun with your pancakes. How about this giraffe one I made for my son?
All you need is a craft squirt bottle, pancake batter and a hot griddle. I watched Jim make them on YouTube. Listen to his daughter, she is just precious.

Sunday, July 25, 2010

Beautiful Book Wreath

Ok folks, this is totally not my idea. In fact the person I stole this craft from stole it from someone else! But look at this thing...it's BEAUTIFUL!

I call it my Living with Lindsay wreath.
Head over to her website and see the full tutorial and even a video of the techniques she used. Simple-simple to make and it looks so sophisticated.


I just love the ripples and curves of paper all over.

This is also a great recycling craft to make. Before your going to throw out that old, worn book away; consider making this beautiful wreath for a friend or family.

Happy crafting!

Saturday, July 24, 2010

Truckload of Candy!

This project was for my mother's social group a few months ago. She needed a thank you gift that would be unique and fun. Their "theme" for the year was transportation, so what goes with everything? CANDY!

We made these dump truck's hauling candy, in a few very simple steps. Wish I was that driver...That job better have a good dental plan.
Y0u will need:
  • A toy dump truck ( Target)
  • Floral foam the long block kind works best (Micheal's)
  • Knife
  • Individually wrapped candy with "tab" wrapper ends: Mini: Snickers, Milky Way, BabyRuth, Crunch (Dollar Tree)
  • Push Pins (Dollar Tree)
  • Shredded paper grass (Dollar Tree)
  • Glue
Take your floral foam and cut with your knife to fit into the bed of your dump truck.

Cover one wide flat side of the foam and half way down the sides with the glue. Lightly cover with the shredded paper grass. Let sit until dry *Sorry no picture of this step


Once the glue has dried take your candy and push pin through the wrapper ends into the exposed foam. It's important that it's through the ends, as to not open the candy.

Continue until you have covered all of the exposed foam. It took me approximately 25 pieces for each truck.
Place the candy block into the dump truck and you're ready to roll!
BEEP! BEEP!

Thursday, July 22, 2010

Peachy Keen (Part 3) Ice Cream

Not long ago I bought an automatic ice cream maker with the grand idea that all the flavors of the world were my fingertips. What would I create? What did I want?

Everyone knows the kind of ice cream they like. But how to break that down into a recipe?

I wanted something rich and creamy with hints and subtle suggestions of flavors. I love Alton Brown and he went through the steps of how ice cream is made, the different kinds of ice cream bases from the cheap-y kind that you get for $2.00, to some of my favorite rich and creamy kinds that are $7.00 for a pint! Oh, but so worth it!

Looking at a variety of recipes, I wanted the kind that use eggs and cream to gain that smooth flavor.

This is recipe creates an AMAZING Peach flavor without being overwhelming. I made a gallon, and it went fast!

I'll just have to go pick more peaches and make more very soon :)
Peach Ice Cream- Makes One Gallon
  • 5 cups of peach puree, blend them with the skins on!
  • 3 whole peaches, skinned, chopped and set aside.
  • 6 egg yolks
  • 3 1/2 cups of white sugar
  • 4 cups heavy cream
  • 2 cups milk (more milk fat the better, I use whole)
  • 2 tsp vanilla (or 1 vanilla bean with the seeds scooped out)
  • 1/2 tsp of salt
  1. Mix together eggs and sugar until blended. Slowly add the puree until smooth.
  2. Add the cream, milk, vanilla and salt, blend well. I used my KitchenAid mixer for this recipe and the bowl was almost overflowing
  3. Pour the mixture into your ice cream maker and follow your manufacturers instructions. Be careful not to overflow and leave room for expansion. You're making ice crystals people! Add the chopped peaches later following the instructions. This recipe was too big for my little 1 quart maker, and I ended up pouring 2 1/2 cups at a time, 4x!
  4. Remove ice cream from the machine to a freeze safe bowl, cover with lid.
One Quart (Many thanks to Mr. Beautiful for helping with the math)
  • 1 1/4 c of peach puree
  • 1 peach skinned, chopped and set aside
  • 2 egg yolks
  • 1 c of white sugar
  • 1 c of heavy cream
  • 1/2 c milk
  • 1/2 tsp vanilla
  • 1/8 tsp salt
There you have it! Enjoy this beautiful dessert.

Peachy Keen (Part 2) Honey

So in my previous post, I described my adventures in canning peach slices here and in the process I had you keep your slimy peach skins in the refrigerator until now.

I made the super sweet, deliciously different topping: Peach Honey. It's so easy you wonder why you never made it before.

The Juice

Now, normally a recipe for Peach Honey would have you boil your skins in water (just enough to cover them) until they are soft and tender. Then, take your skins and place them in a cheesecloth and squeeze as much juice as possible from them.

The goal is you want the juice, not the pulp. I am fortunate enough to own this wonderful contraption: The Jack Lelanne Juicer. I just put in my peach skins and the pulp popped out the back while giving me the juice! Talk about easy!

After juicing my saved skins, I hardly had any juice and I need 8 cups of the stuff! So I just de-pitted more peaches and popped them in, skin and all! I really love my juicer! 10-12 (I lost count) peaches later I had plenty of sweet juice.

All you need for Peach Honey is:
  • A large pot
  • 8 cups of peach juice
  • 4 cups of white sugar
  • a VERY big pot or canning pot to sanitize/vacuum your jars
  • Ball Jars (this recipe made 2 pints!), lids and rings
  • Jar grabber
  • Jar funnel
  • a wooden spoon and large ladle
Hot Peaches...Check it and See...I got a fever of...

Place your peach juice in the smaller of the two pots and turn up the heat to med-high. Bring to a steady boil and boil! After a few mins, add 2 cups of sugar. Mix thoroughly with the wooden spoon and boil until it looks well dissolved. Add the remaining sugar and repeat. Now it's just waiting. You boil and stir every few minutes until your peach juice has the consistency of honey.

This would be a good time to sanitize your jars. Read my blog about canning peaches if you don't know how.

Before:

After (I think) 2 hours:

Once you reached the desired consistency*, take out your ball jars from the warm canning water. Return that water to a boil! You may have to add more water at this time, there needs to be enough to have 2 inches above the jar lids to bathe them properly.

Place your funnel on top of the clean jars and fill within 1 inch from the top.
Wipe the edges with a clean cloth, place on the lids and rings (screw tight), and return to the boiling canner water for 5 mins.

Remove from the water with your jar grabber and place in a cool, draft and dry area where the jars wont be disturbed for awhile. The Honey will thicken further as it cools.
Isn't it beautiful? Look at those delicious sugar crystals we made in the honey, mmm....You're going on my waffles tomorrow morning!

Easy right?

* if your honey doesn't thicken up, just add 1/3 of a packet of pectin and 1/3 of added sugar.

Wednesday, July 21, 2010

Peachy Keen (Part 1) Canning

Yesterday, Mr. Beautiful wanted to go out into our field and pick some peaches. He brought me these:
And this monster!

What is a lucky girl to do? I'm starting out with canning sliced peaches since I eat peaches practically every day (sometimes with my yummy scrambled egg whites on the side). And having a toddler around, it would be economical of me to get these bad boys in the cupboard before the season is out.

It was a race between the birds and me, and I must have picked about 18 lbs total.

You will need:
  • Peaches, washed skinned (I'll explain how) and sliced
  • Jar Funnel
  • Jar Grabber
  • One VERY large pot (also known as a water bath canner), a saucepan and a 3quart pot
  • A big plastic bowl
  • Ice
  • Ball Jars (this recipe makes about 7 pint jars)
  • Large spoon and ladle
  • White sugar

Select Your Fruit

Make sure you pick peaches that are ripe but still a bit firm, little to no bruises and free of wiggly critters. Put simply, the kind that you would want to eat yourself. How many should you get? On average it takes about 5-7 peaches to fill a quart jar. I'll let you do the math.

Make a Sugar Bath and Hot Bath

Most of us buy our peaches packed in either water; light, medium or heavy syrup. The added sugar helps improve color and retain the fruits shape while packed. I prefer to go the less caloric-adding path and opted for light syrup.

Pour: 6 cups of water and 2 cups of white sugar into a pot and boil just enough to dissolve the sugar. Turn the temperature down to keep it warm.

*For Medium syrup the ratio would be 3c sugar to 6c water, and heavy syrup is 4c sugar to 6c water.

Now that you have your syrup done, you need to get ready to can. Time to clean those ball jars!

Sanitizing

Even if you just bought those jars, rings and lids and they came right out of the plastic packaging, you still need to sanitize them to kill off any hidden bacteria that could later ruin an entire jar of peaches 6 months from now. And that would be heartbreaking, shouldn't it?

This job is easy if you are lucky enough to have a dishwasher with a "sanitize" function. Just run all the parts through and keep them clean in the washer until you need them.

If you're like me...sigh, and wash everything by hand. You need to fill your VERY big pot with water and place your jars inside, set on the stove. Bring the water to a rapid boil for 10 mins, then turn off the stove. Keep the jars in the hot water until needed. Back to the Peaches!


Prepping the Peaches

Get your 3 quart pot and fill 2/3 of the way full with water and place on the stove. By this time you should have: Sanitizing pot warm with jars (or in the dishwasher), a saucepan of warm sugar water, and your 3 quart pot.

Bring the 3 quart pot to a steady boil. While you wait, wash your peaches in the sink (no soap, just warm or cool water) to remove the "fuzz" and sort out any sticks and leave you may have collected. Let drain in the sink.

Take your plastic bowl and fill with water and about 1-2cups of ice to make an ice bath.

Next part is fun!

Take a slotted spoon and drop 3-5 peaches into the boiling water for 30-50 seconds. Remove from the water and drop into the ice bath for a few minutes. The skins of the peaches will slide off easily now! If the skins don't slide easily it is probably because the peaches were not ripe and you have to boil them a bit longer. It's OK to put them back into the water.

Easy! Kids would love to peel the slimy skins off and it's much faster then peeling by hand. This same technique can be used on tomatoes, plums, apricots or pears.
Save the skins in the refrigerator for peach jam!

Slice the peaches open and remove the pits. Slice into halves or wedges whatever you'd like and set aside until all the peaches are done. Sprinkle some lemon juice over the slices to prevent browning while you work.

Hot Packing

Time for our sugar bath! Drop in the peaches and let barely boil for 5 mins.

This boiling the peaches isn't "necessary," but I think it is. It kills off any surviving bacteria on the peaches, helps prevent floaters and makes them a bit softer so you can pack more into each jar :)
Take out the jars from the warm water, put your jar funnel on top and slowly fill with peaches. Pack them in pretty good, but only fill the jar 1 inch from the top. Ladle some hot syrup over the top to fill it 1/2 inch from the top.

Why the head space? Not enough room above the food doesn't allow the movement of liquid or the expansion of solid foods. If there is not enough room, some of the liquid or food is forced out and prevents making a solid seal. Too much space means trapped air (i.e. bacteria) can infect or darken your food. You can use a knife to double check for air bubbles.

Use a clean cloth to wipe the rim from any spilt syrup, place on the lid and screw on the ring. I tilt the jar just a bit to make sure I got the ring on tight (but not too tight). Fill the rest of the jars in the same fashion. Admire your work, you're almost done!

Place the jars back into the VERY big pot and bring to a rapid boil. Boil for 20 mins.

My mother says this step isn't necessary either, you can simply invert the jar and leave alone for 20 mins and the heat from the jar and the syrup will seal them for you....well, I'd rather be on the safe side.

Boiling the jars once filled will supposedly harden the glass jars and create an effective vacuum sealing the jar.

After 20 mins, remove with the jar grabber and place on top of a towel in a cool draft free place where they won't be bumped or disturbed for 24 hours.

Fruits of your Labor

And that's it! From start to finish, I made 7 jars in 3 hours. Was it worth all that work? I'd say yes since homemade good almost ALWAYS beat the commercially made goods anytime.

When cool, smack on a homemade label with your name on it and be proud. These babies will keep for a year if stored in a cool, dry place.

Some browning may occur or some might even change color (due to the chemical reaction in the fruit when processing).But, that doesn't mean it's spoiled. All fruits do brown a little bit, that is to be expected. But if you see mold, throw it out! Keep and wash the jars for another day.

Next blog, remember I said to save those peach skins....

Tuesday, July 20, 2010

Thank you Cow.

"I doubt whether the world holds for anyone more of a soul-stirring surprise then the first adventure with ice cream.-" Heywood Broun


Yesterday I was strolling through Target when I popped over to the end of the summer saving :) I splurged and bought an ice cream maker (75% off whoo-hoo!). It's nothing like the one I had as a kid. You know the kind. The big wooden tub and the tiny metal one inside, the freezing ice and salt sticking to your legs. You spend what seems like hours cranking and cranking that handle for your delicious summer reward: Ice Cream!

I went the easy route this time, it's automatic and takes approx 25 mins for delicious homemade desserts. But I was thinking...

Of all the ice cream machines out there, the world must really love this chilly treat to have it available year round and make it available to the masses. So I went online and wanted to find the ways we get our ice cream.

Store Bought

Homemade Popsicles (notice the fresh fruit!)

Electric Homemade


Ice Cream Ball


(looks fun, but very expensive for so little)


Ziploc Method


Coffee Can Method


Hand Cranky-Cranky


Local Ice Cream Man


Cake

And of course, there are hundreds of ways that we consume and manipulate this delectable dish from the classic cone, Sundae, bars, floats, sandwiches...and on and on

We feel like playing taste bud Gods when we invent new flavors and combinations that send our senses to heaven. I know I will be when I play around with my new ice cream maker!

So let me end in tribute to the cow, by which this dairy creation and millions of happy children are indebted to its service. Thank you cow.

Just because, isn't this Neapolitan cow too cute?
Just for "Mooo"re fun: Ice Cream History:
http://inventors.about.com/od/foodrelatedinventions/a/ice_cream.htm
http://www.makeicecream.com/hisoficecrea.html


Saturday, July 17, 2010

Saying Thank You

Well it's been a week, but my house is finally put back together after my son's birthday party. Having so many friends, family, nieces and nephews stay the night, it really takes a toll. The new toys have found a home, clothes are washed a put away. All that is left is to write my thank you cards.
I was thinking about this as I pulled out my always ready stash of "thank yous." I have always firmly believed in sending thank you cards when you recieve a gift or someone went out of their way and you really need to send something to show your appreciation. But a thank you doesn't need to be a formal outreach, it just has to be sincere and from the heart so the recievee knows how much they have impacted your life.

It has always bugged me that friends and family I know send out pre-manufactured thank you cards, with only a signature inside. How is that personal? I feel like I was part of an assembly line. So below is my set of "how to's" to write the perfect, sentimental, heart warming card ever.

You will need:
  • BLANK thank you notes, they are cheaper and you have room to write
  • A pen, pencil smuges
  • Envelopes, addresses and stamps
  1. Start off by addressing the person, or people involved in giving the gift.
  2. Tell them you were glad to see them, wishes they could have made ____, sorry you missed them, grateful they travelled so far, or "thank you" for remembering this special day
  3. Thank them for the gift, act of kindness etc... SPECIFICALLY, and how it changed things. If it was a gift, describe how you'll use it. If it was some act, describe briefly how they helped.
  4. If the person (or their family members) did any other ways of helping, make sure to say that too. No little act goes un-appreciated.
  5. Close by thinking of how you will see them next, or describing how much the person you are thanking means to you.
  6. Sign with affection: Love, Cordially, etc...
  7. All Names that are saying "thank you"

Here are some examples:

Thank you for a check from an Aunt and Uncle I don't know well.

"Uncle___ and Aunt ___, I was so surprised that you remembered my birthday. It really means a lot to me since I know we do not talk as often as we should. Thank you so much for the check of $30, it will be nice to have some splurge money for coffee and "me" money. Maybe that purse I have been eyeing :) I hope we can get together soon, I will be making a trip down South your way, I will call and see if we can stop and have lunch. Thank you again. Love, Sarah"


Thank you to a business for helping with a fundraiser

"To ___, Thank you so much for the wonderful contribution to our organization's fundraiser. The potted plants you donated for the silent auction will definately bring in some significant revenue for our cause. I know your business does much to help our local community and we appreciate every effort you do. In turn, we will encourage others to support your wonderful business and it's employees. Thank you again, Sarah."


I think realistically, and odds are no one is going to keep their thank you card forever (unless it's a business and they post it on their wall).

So, don't spend a lot of money on thank you's. The message means 100x more then the card.

Card pictures courtesy of The Card Store:http://www.cardstore.com/thank-you-cards.html


Thursday, July 15, 2010

Forward Giveaway

Who doesn't like a giveaway? Seriously, some people don't even care what the prize is. Well Bonnie, over at Creative Decorating on a Budget is giving away $40 gift certificates for CSN. Shopping at home! Splurge Money!

There are three ways to enter:
  • Visit the CSN store, and then Bonnie, and tell her what you would buy if you won.
  • Just Visit Bonnie, and become a follower (make sure to tell her if you are a newbie so she can say hi!)
  • Add this giveaway to your own blog with a link back to her site.

I chose the third option. I like spreading good news whenever I can, even if it decreases my odds of winning!

So go visit Creative Decorating on a Budget, enter to win and check out her blog. There are some pretty cool ideas there.

http://creativedecoratingonabudget.blogspot.com/2010/07/csn-giveaway-my-first-but-hopefully-not.html

Tuesday, July 13, 2010

Chocolate Covered Oreos

I know it's kind of hard to improve on the Oreo, except maybe if you do this:


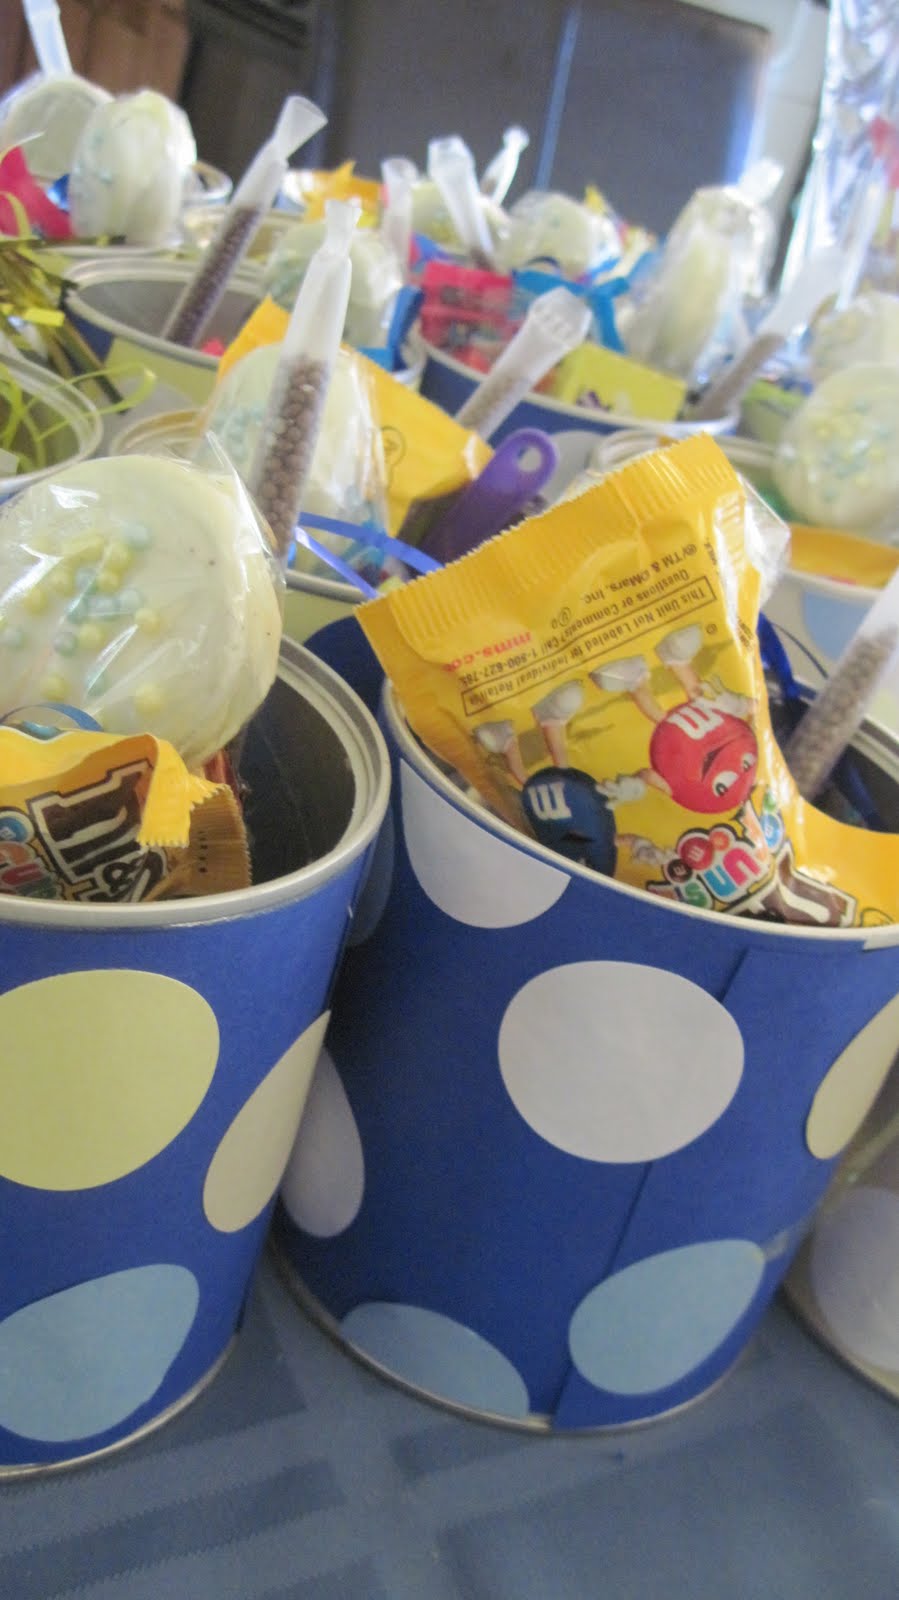
But this is about making them covered in chocolate! A deliciously different approach to a classic cookie. It's really easy and impresses a lot of people, especially little ones.

You will need:

  • 1 package of Oreos, plain, mint or double-stuff
  • 2 bags (12 oz each) of white or milk chocolate chips
  • 4 tbs of Crisco
  • Double boiler or microwavable safe bowl
  • A cookie sheet
  • Freezer room!
  • 30-40 lollipop/Popsicle sticks/craft sticks
  • wax paper
  • sprinkles

Turn on your stove to med-high and get a boil going in your double boiler, then turn the heat down to a very low simmer. Pour in your chips (do one bag at a time to prevent the chocolate from burning). Mix in 2 tbs of shortening (Crisco) to make it smooth and creamy. Add more if the chocolate is too thick. It should just pour off the spoon.

If you are doing the microwavable method, pour in about 2 cups at a time of the chips and shortening, heat on High for a few seconds (15-30) then take out and stir. Return back to the microwave and repeat until the chocolate is smooth and dripping.


Cover your cookie sheet with wax paper. Once your chocolate is perfect, twist apart all your Oreos and lay flat on a cookie sheet. Dip your stick into the melted chocolate and then press onto the cream filled cookie. Put the cookie back together.

Freeze the cookies 15 mins until firm. Don't skip this step or the cookies will fall apart when dipped!

Dip, one at a time into the chocolate, using a spoon to help coat. Resist the urge to lick the spoon, it's hot. Tap off extra chocolate to get that smooth look. *If you are using the microwave method, you may have to return your chocolate to be re-heated once it begins to set. If you set your bowl with the chocolate in some warm water, it will help keep the chocolate warm.
Place cookies on the wax paper and decorate to you're heart's delight. If the chocolate sets before you remember the sprinkles, just give it a quick "paint job" with the back of the spoon in the melted chocolate. Return to Freezer for 30 mins or until set. Store in an air tight container.

Make Zebra cookies and drizzle milk chocolate over white or vice versa.

Dip, Sprinkle or Coat in holiday or "event" (graduation, baby shower etc.) sprinkles.


These will keep in the freezer for about six months.

Monday, July 12, 2010

Birthday Party Can Favors

All I can say about the last week is: "Wow" and "It was all worth it!" My son, John-David, turned one year old this last week and we threw a big party with lots of family and friends coming from out of town to stay.

There was lots of food and cold drinks for everyone to eat outside. Everything would have gone wonderfully if the weather didn't decide to be 104 degrees and make all my guests sweat. I almost broke into tears thinking all my pictures I had planned in my head were going to be ruined, the food was melting....but everyone said they had a wonderful time! And that is what really matters.
I wanted to post a few of the things I made for John-David's party. So let's start with the party favor cans...

I am sort of a recycling nut (not a hoarder, but I do re-use items if I can). I saved almost every formula can we bought this past year (3 garbage bags full for those who are thinking back to how many formula cans they used for their babies). I KNOW those cans are good for something. I have a few around my house for paint or cleaning. F.Y.I. they hold water really well.
I wanted the party favors to be useful and memorable ( I hate waste), and these were perfect. I went to Michael's Crafts and bought or had around the house already:
  • 5 color pack of card stock paper in the colors of the party.
  • A circle punch.
  • 3M Multi-Purpose spray Adhesive
  • A bottle of Elmer's glue
  • Small Formula Cans (12.9 oz)
  • Scissors
  • Ruler


Take a formula can and strip off the label, I kept the lids for some other project and threw away the scoops. Wipe the inside clean.


Take a piece of card stock and wrap around the can just under the silver lining. Make two small marks inside the lining otherwise the paper won't look right. Lay the paper flat and using a ruler draw a line, mark to mark and cut.


It should look something like this. But notice the big gaping hole? Just measure a small bit of the remaining paper to fill that in. This is a good time to use your cut paper as a template for however many cans you are going to decorate. Please ignore the uneven cutting I made on this example can. I forgot to take pictures while I was making them originally.


Spray the card stock lightly to make it tacky, on the side you see the cut marks on, and immediately apply to the can. Do the same for the filler piece or just use Elmer's glue.

Cut out your dots in different colors and glue all over. You can use dots of different sizes to make it look silly and fun. Or cut the punched out circles into spirals?

I had two "rules,"the can couldn't have dots the same color as the background color and at least 2 dots had to be cut and glued on to it so it looked as if they were continuing off the edges. I used between 11-14 dots per can.


The party cans I had are filled with yellow Easter grass, candy (the good kind!), homemade chocolate covered Oreo's, squirt guns, noise makers, and magic straws!

When all the goodies are gone, these cans can be used for other purposes in the home and our guests will always remember the fun they had.

Tuesday, July 6, 2010

Ribbon Flower Wreath

I've been checking out the other blogs out there in blogland and I came across http://frugalflourish.blogspot.com/ where Jess took a great idea from Martha Stewart's site to make some cute patriotic napkin rings
but changed this project around a bit and wanted to make some cute flowers for her welcome wreath on her front door. http://frugalflourish.blogspot.com/2010/06/creating-ribbon-flower-wreath.html/2010/06/creating-ribbon-flower-wreath.html
Cute huh?

With my son's birthday a few days away (it's polka dot themed) I thought it would do the same idea for our front door.

So I ran out and bought some $1 ribbon out of the Micheal's bins and my lovely grapevine wreath ($2 after my coupon :)).

I cut my ribbon 15" long

Thread a needle with any color thread (since you won't be able to see it when done) and put aside for a minute. Take your ribbon and begin folding it accordian style, keep it pinched together on one end. Thread through all the loops through the part that you're pinching. I pulled the thread taut and tied a knot.


Because I used 5/8 in ribbon (you really need like 1/2in or 1in+) my polka dots came out looking more like flowers. So I fanned the ribbon out and they still looked good.

I used Jess's idea of using a bobby pin to secure the flower to my wreath.

Ta-da! Beautiful... I will probably add a bunch more later but the baby is crying, got to go!