Wednesday, November 30, 2011

Turkey, Quinoa and Pear Stuffed Cabbage Rolls

Most of the recipes that I come up with are inspired by two questions: "What haven't I eaten in awhile?" and "How haven't I prepared that food yet?"

Answers: Cabbage and Cabbage rolls.

Most cabbage rolls I searched for are just plain rice with some red sauce on top (boring!) I mean for an international dish (every country seemed to have their own version of the cabbage roll), there was very little variation).

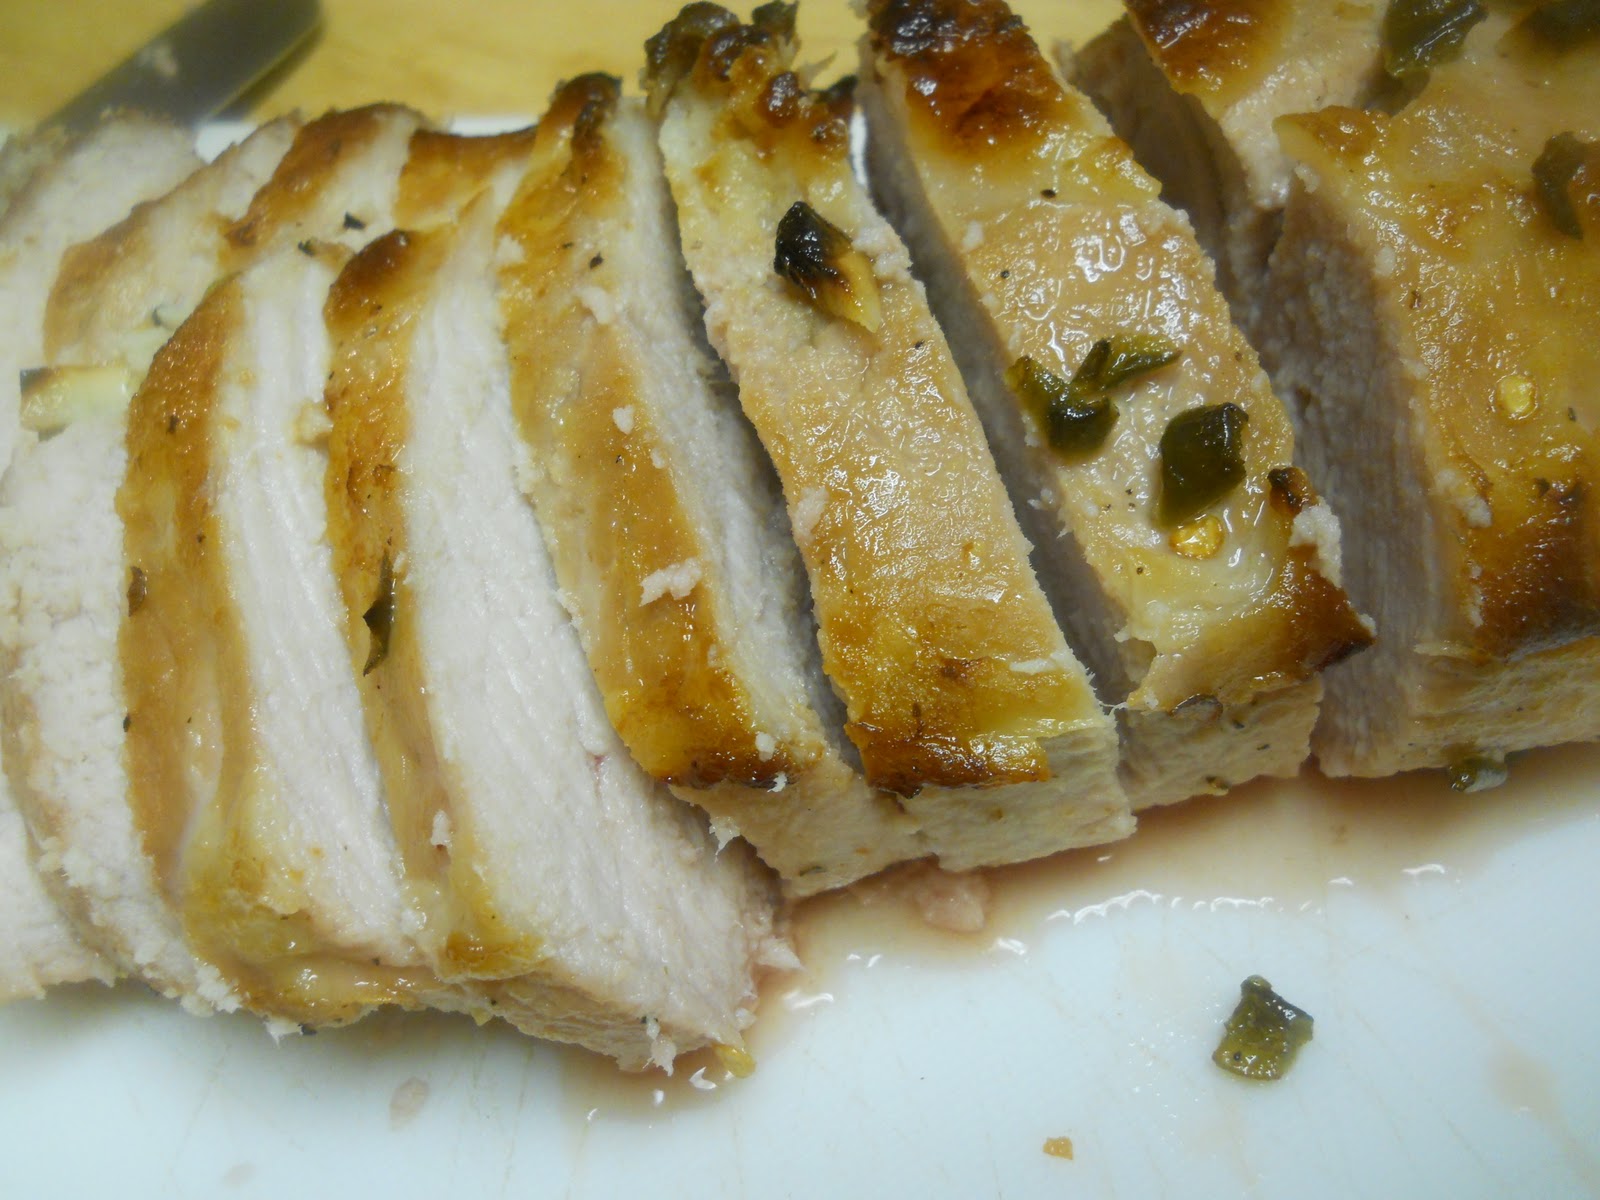
I knew I wanted to use my leftover turkey from Thanksgiving, especially in a way that was subtle and not so overly turkey. I'm sure a lot of you are tired of preparing Thanksgiving leftovers always in the same way.

So, I thought I'd approach this conundrum as: "how would I stuff a turkey?" and just turn it inside out! Voila the Turkey, Quinoa and Pear Stuffed Cabbage Roll was born.


Turkey, Quinoa and Pear Stuffed Cabbage Rolls

1 c uncooked Quinoa                                                              Serves 4
2 c vegetable broth
1 head of Cabbage, approx 12 leaves
1/2 c yellow onion, diced
1/2 c turkey, chopped or shredded
1 zucchini, shredded
1 small pear, peeled, cored, diced
1 tbl garlic paste or 1 clove of garlic finely minced
1/2 tsp oregano
1/4 tsp marjoram
1/8 tsp ground sage
salt & pepper

Optional:
1 c marinara sauce
1/4 c mozzarella cheese

 
1. In a medium sauce pan, pour in your vegetable broth, bring to a boil. Take out a large pot and fill with water, bring to a boil too. Pour quinoa into the vegetable broth, reduce to simmer and cook 15 minutes. Turn off the heat, fluff with a fork and let cool. (I put my whole pot in the freezer for 5 minutes to speed up the process).

2. While Quinoa cooks, take apart your cabbage leaves and drop into your large pot of boiling water for 1-2 minutes; just enough to soften them. Let dry on paper towels and trim (see picture below). Preheat the oven to 350F.

Trim the spine of the leaves to make them flexible to roll. Just a little trim off the top is good.

3. In another saucepan, add a little olive oil. Sautee onions for 1 minute. Add turkey and garlic, cook for another 2-3 minutes. Add shredded zucchini and pear; sautee until water is absorbed out; pear and zucchini are tender. Season with spices.


4. Mix in quinoa with the vegetable-turkey mix, salt and pepper to taste.


Spoon about 2-3 tablespoons of the mixture into the cabbage leaves and wrap like a burrito. Place into a casserole dish seam side down. Top each roll with a little marinara sauce and a sprinkle of mozzarella cheese.

scoop
roll
place


5. Cover with a lid or with foil and cook for about 35-45 minutes- or until tender. Note: I would omit the sauce next time, the flavors kind of clashed in this dish or maybe I'll be creative and use a mushroom sauce instead. Sauce or not, it's really up to you. It was very good either way.


Calories calculated using Sparkrecipes Calculator: 270 calories for 4 rolls


The health benefits of this meal are awesome.
Quinoa is one of the best foods I could have ever stumbled upon. It goes well with anything and is power-packed with nutrients. Not to mention- it's wheat and gluten free! This mega grain contains ALL the essential amino acids (making it a great food for vegans and vegetarians). No wonder South American Natives called this food "the gold of the Aztecs". It is also high in Vitamins B2, E and fiber.
Cabbage is also a nutrient dense food. I've been trying to incorporate more and more cabbage into my life lately for that very reason. Cabbage is known for it's phytochemicals, which contain powerful anticancer glucosinolates. It is high in Vitamin C, B6, potassium, folic acid, magnesium, manganese and calcium!

Tuesday, November 29, 2011

Vegetable Stuffed Shells

In the mood for some creamy cheese filled carb boats? Me too!

But I HAVE to make the standard stuffed shells recipe a bit more healthy. This is normally considered an "easy weeknight, everynight" dish. But come on? Who's waistline can afford that much gooey goodness all the time?

Which means, make the most of your vitamins and watch your serving size and there should be no guilt on a normally considered indulgent dish. 


Bring on the Veggies!

Vegetable Stuffed Shells                         Serves 4

16-18 Jumbo pasta shells (wheat is best)
2 cloves of garlic, minced
1 zucchini, shredded about 1 1/2 c
1/2 c yellow onion, diced
1 {2 lb} bunch of fresh spinach, roughly chopped
1 small carrot, finely shredded
1 1/2 c part skim ricotta cheese
1/2 c Asiago cheese, shredded
1 egg
1 tsp salt
1/2 tsp pepper

1 c mozzarella cheese, shredded
1/2 jar marinara sauce or 1 1/2 c homemade pasta sauce

1. Cook pasta shells according to the package directions. Drain and set aside when done. Meanwhile start your filling.

2. In a medium saucepan add a little bit of oil. Sautee garlic for 1 minute or until aromatic. Add onions and sautee another minute. Add carrots an zucchini and sautee until tender and all water is evaporated out of the pan. Add spinach and sautee until wilted.

3. Pre-heat oven to 350F. Transfer veggies to a large bowl, combine with the rest of the ingredients (ricotta-pepper). Lay out a shallow roasting pan, spread 1/2 c of sauce on the bottom of the pan. Stuff your shells and place in the pan.


4. Drizzle 1/2 c marinara sauce over the shells and sprinkle 1/4 c mozzarella cheese on top. Cover with the lid or aluminum foil, bake for 30 minutes.


5. Enjoy!

Note: I noticed the zucchini was deviously hidden in these shells. If you have a child that hates green things (like mine), peel the zucchini and omit the spinach.

Calories calculated using Sparkrecipes Calculator: 460 calories for 4 shells

Monday, November 28, 2011

Zucchini-Carrot-Potato Latkes

I have stated before that I am not a big frying person. I don't like the idea of spluttering hot oil just asking to burn me if I make a mistake. But there are certain food that I will take a risk for.

The Veggie Latke is one. I LOVE these little potato pancakes and thanks to my BHG's magazine inspiring me, added shredded carrots and zucchini and it made them even more amazing.


Try these next time you want a warm lunch and have friends over.

Zucchini-Carrot-Potato Latke           Serves 4

4 small russet potatoes, shredded
1/2 small onion, shredded
1 zucchini, peeled and shredded
2 carrots, peeled and shredded
1 scallion, sliced
2 eggs, slightly beaten
1/3 c bread crumbs
1/2 tsp salt
1/4 tsp pepper

1. Combine shredded vegetables (potato-carrots) in a thin, clean cotton dish towel or a double wrapped piece of cheesecloth. Squeeze out as much liquid as you can (this makes some muscle, recruit a show-off man that happens to me lurking around the kitchen).

2. Empty contents into a bowl, mix remaining ingredients. Take out a shallow frying pan and pour in 1/4 inch vegetable oil in the bottom. Heat until hot, 375F.

3. Using your hands, form golf ball sized balls of the vegetable mix and gently place into the oil. It's important not to overcrowd the pan or it will reduce the cooking oil's temperature resultingin: uneven browning, more oil absorption of the latkes due to longer cooking, and the latkes may stick together if touching. Don't cook more then 3 to 5 at a time. Flatten each one with the bottom of a slotted spatula. Cook 3 minutes on one side, turn once and cook an additional 2 minutes for the other side until golden brown.


4. Remove with a slotted spatula to a plate with paper towels to drain. Repeat with remaining mixture.


5. Serve with sour cream and garnished with chives if desired (I highly desire it).

Calories calculated using Sparkrecipes Calculator: 219 calories for 3 lakes. Note: Calorie count does not include the oil absorbed when cooking or garnish.

Sunday, November 27, 2011

Flourless Peanut Butter Cookies

I really should call this recipe, my "2^5th Power Peanut Cookies."

The other day I felt like baking and was taking requests, someone in my family asked me for peanut butter cookies AGAIN. I love that my family love my baking and wants them again and I admit, peanut butter cookies are great, but I really dislike making the same thing over and over again.

So, with permission for creative license, I decided to make gluten free peanut butter cookies with ganache toppings.


Yum!

Flourless Peanut Butter Cookies                 Makes 24
adapted from Women's Day

2 cups creamy peanut butter
2 cups packed light-brown sugar
2 eggs
2 tsp baking soda
2 tablespoons peanuts, coarsely chopped

Ganache
1⁄2 cup heavy cream
1 cup bittersweet
chocolate chips
Garnish: chopped peanuts


1. Heat oven to 350ºF. Beat peanut butter, brown sugar, eggs and baking soda in large bowl until smooth and blended. Stir in chopped peanuts.

2. Drop rounded tablespoonfuls 2 in. apart, onto ungreased baking sheets. use the back of your spoon to slightly press cookies down. Bake, one sheet at a time, 10 minutes or until cookies are puffed and slightly golden. Cool 5 minutes on baking sheet; remove to wire racks to cool completely.


3. Microwave cream in glass bowl on high 1 minute or until it just begins to simmer. Add chocolate chips; let stand 2 minutes. Stir until chocolate is melted and smooth; spread over half of cookie top and sprinkle with chopped peanuts. Or fill a squeezable bottle with ganache and drizzle, sprinkle with peanuts, then drizzle again.


Note: If ganache begins to firm up, microwave a few seconds at a time until easy to spread. Let set at room temperature. Ganache will take a few hours to set up. It's best to let them sit for 4+ hours then serve.

Calories calculated using Sparkrecipes Calculator: 237 calories per cookie

Monday, November 21, 2011

Pizza Dough

If you have never made homemade pizza, this should be one of your top things in your home to make homemade. I've seen women bloggers out there making their own vanilla extract, yogurt and everything in between, so why not more pizza? 

What seems like a speciality food only professionals can do is not true. You CAN do this!


Homemade pizza is always outrageously delicious. It does not take a lot of your time, total of 2 hours prep/cooking (if your making a meat topping, less if it's all veggie). Plus, it's a fun family project to do together. I had kids of all ages helping me and sure enough, everyone gobbled this pizza up like it was going out of style. Even those kids that cringed at the site of anything green, they ate it, spinach and all.

To make a good pizza, you need to start with a good crust.


Pizza Dough                                        Serves 4

2 1/4 tsp active dry yeast
1 c water, (105-110 F for active dry)
2 1/2-3 c bread flour or all purpose flour
1 tsp salt
olive oil

1. In a small cup, dissolve yeast in water. In a large mixing bowl, stir together 2 1/4 C flour and salt. Add yeast and stir until smooth. Let the dough rest 10 minutes.

2. Knead the dough until the dough approximately 10 minutes until the dough becomes elastic and smooth. This dough will be soft and a little tacky, so resist the urge to add too much flour.

3. Place the dough back in the bowl, coat with a bit of olive oil and cover with a towel. Let rise in a warm place until doubled in size, approximately 1-1 1/2 hours.

4. Using a cookie sheet or pizza pan, roll out to:
  • 4- 4 in individual pizzas
  • 2- 8 in pizzas
  • 1- 14 in pizza
Pre-heat oven to 425F. Cover rolled out dough with a towel again and let rise 15 minutes for thin crust, or 30 minutes for a softer crust.

5. Top with your favorite sauce and toppings. Bake 10-15 minutes or until dough crusts are golden brown.


Pictured above, my pizza is mozzarella cheese, spicy sausage, onion, tomato, and spinach.

Calories calculated using Sparkrecipes Calculator: 348 calories for two slices 

Saturday, November 19, 2011

Honey Lime Pork Roast

I have been in love with the new flavor combination of honey and lime. It's tart and sweet and tastes delicious on every meat type I have tried so far (beef, chicken and now pork).

In my usual shopping splurges I bought a pork roast thinking I haven't served that in awhile in my home. But as it sat in my fridge for 2 days, I didn't have a plan for it yet until I saw that I had two limes left in the BACK of my fridge. Inspiration struck and, as usual, I'm oh so glad I followed it.

I love the sweet crust this loin produced from the honey and the slight bursts of heat from the jalapeno. Yum!


Enjoy this tangy, fresh and savory recipe.

Honey Lime Pork Roast                       Serves 5-6

Juice of two limes
1/4 cup butter, melted
1/4 cup honey
1 teaspoon dry mustard
1 teaspoon coarsely ground pepper
2 teaspoons salt
2 teaspoons ground cumin
1/4 teaspoon ground red pepper
3-4 fresh garlic, finely chopped
2 jalapenos, seeded and chopped
2 lb pork roast, or tri tip roast

1. Combine all marinade ingredients in a resealable Ziplock bag, squeeze bag slightly to mix. Place roast on a cutting board and cut 2-3 deep slashes into the meat, move roast into the marinade bag; seal tightly. Refrigerate for 8 hours or overnight.

2. Pre-heat oven to 350°F. Line a 13x9 roasting pan with aluminum foil. Place a roasting rack at the bottom, generously sprayed with non-stick stray if desired. Remove roast from marinade, place on the rack. Scoop out a few garlic chunks and jalapenos, push into the slashes made earlier. 

3. Bake for 25-35 minutes per pound of roast, or until meat thermometer reaches 160°F. Let stand 10 minutes under a foil tent to keep in the heat.

4. Serve, sliced on the diagonal with steamed vegetables and quinoa or rice.


Calories calculated using Sparkrecipes Calculator: 328 calories per serving

Wednesday, November 16, 2011

Fish Tacos

I LOVE fish tacos. They always remind of of sitting by the ocean and smelling the salty air, being in a foreign place with fresh produce and just having a good time.

I just recently saw this Taco Festival online last night that I REALLY want to go to some day, and the number one most searched for taco recipe? Fish! I don't think my tacos can compare to their seemingly gourmet ones, but they are delicious and the uncomplicated kind (which to me is better).

These tacos are great for quick dinners (not to mention so much healthier then most packaged quick dinners) and they can feed a lot of people if you are having a party.


Fish Tacos                                      Serves 4 -3 tacos each

2 lbs. fresh Tilapia fillets or any favorite fish
2 tbl butter, melted
1/4 tsp ground cumin
1/4 tsp garlic powder
8 " flour tortillas
2 cups shredded cabbage
2 green onions, sliced
salt

Sauce:
1/2 cup mayonnaise
1 fresh lime, juiced

Garnish:
sour cream
salsa
fresh lime wedges

1. Thaw fish if frozen and pat dry with a paper towel. Place on a cutting board and cut into diagonal 2" long strips. Spray a shallow baking dish that is big enough to fit all your pieces, lay fish inside dish.

2. Pre-heat your oven to 350F. In a small cup, combine butter, cumin and garlic, brush over fish. Bake for 6-7 minutes or until fish flakes with a fork.


3. Meanwhile, shred cabbage and slice green onions if you haven't done so already. In another small cup, combine lime juice and mayonnaise, set aside.

4. When fish are done, remove them the oven and lightly salt to taste. Warm your tortillas however you like. I like to take a small saute pan and turn the heat onto med-high. Place tortilla in the pan and let it warm one side until slightly puffy and dark spots appear on the tortilla, flip and do the same to the other side. This takes about 2 mins per tortilla.

5. Assemble tacos by taking a warm tortilla in the hand, slather a tsp-tbl of mayo-lime sauce on one side. Fill with a large pinch of cabbage, then 2-4 pieces of fish pieces. Top with green onions and other desired garnishes.


Calories calculated using Sparkrecipes Calculator: 423 Calories for 3 tacos, does not include salsa or sour cream.

Monday, November 14, 2011

Fajita Quesadilla

I can't underestimate how many times a week I could eat quesadillas, or overestimate how much I love eating them.

The simple quesadilla is my favorite food. It's fast, it's cheap, and so easy to make. Did I mention delicious? That should be the number 1 reason for eating anything!


This is the fajita quesadilla. I'm sure many people know how to make melted cheese between a tortilla. Really, that is like kindergarden type of meals.

But for those who want a delicious, step up the lunch scale kind of quesadilla, definitely try this next time.

I also want to add, this is a total party food. Its a definite crowd pleaser and can be easily made ahead and kept warm in the oven. Yum!


Fajita Quesadilla                                 Serves 4

4 large flour tortillas
3 tbl butter
2 cups 1% mozzarella cheese
1/2 red bell pepper, sliced into 1" strips
1/2 green bell pepper, sliced into 1" strips
1/4 large yellow onion, diced
1/4 cup chicken pieces (perhaps from a leftover whole chicken?)

1. In a small pan, melt 1 tablespoon of butter and sautee vegetables until tender, add chicken and cook until heated through.


2. In a large skillet, heat to medium. Butter one side of your tortillas and place in the skillet, butter side down. Fill one side of the tortilla with half the cheese and sauteed vegetable mix. Top with a little more cheese if desired.

This is my 2nd quesadilla, you can see the 1st one under the top one.

Fold over other side of the tortilla. If you are making two and have enough room, butter and add your tortilla repeating the steps to fill, and fold. Cover with a lid and let cook for 2 mins.


3. Remove the lid, with tongs flip the quesadillas, recover and cook an additional 1-2 mins. Move to a cutting board and let sit for 1-2 mins to let cheese settle.


4. Slice into triangles and serve with sour cream and salsa for dipping.

Calories calculated using Sparkrecipes Calculator: 348 calories per serving

Black-eyed Beans and Potato Curry

Some nights you just need to experiment and hopefully you come out with a winning dish.

Meals start with inspiration. Tonight I looked around and I saw my collection of beans sitting prettily in their jars, and I said: "I want something with black-eyed beans" and thus this creation happened. It only takes one thought and some steps to make what you want a reality.

I really enjoyed this meal. It was very good and very filling. You can't go wrong with low in fat, high in flavor meals that feed a family and takes little to no effort to make.

November is a big month of National Health Associations trying to bring awareness to different causes. I take it as a challenge to create, healthy dishes I can be guilt free to eat. October was Unprocessed month. November follows through with overall health awareness.

So enjoy this meal with good healthy thoughts and a nice, satisfied tummy.


Black-eyed Beans and Potato Curry

1 extra large potato, cubed
1 cup, black-eyed beans/black-eyed peas
2 medium tomatoes, finely chopped
1/2 medium onion, finely chopped
4-5 garlic cloves, finely chopped
2 chilis or 2 jalapenos, seeded and diced
2 tsp cumin seeds
2 bay leaves or 1/2 tsp crushed leaves
1 tsp garam masala
1/4 tsp turmeric powder
9-10 mint leaves, chopped (optional)
salt

Beforehand to speed up the cooking process, quick soak the beans. In a pot, place your beans and 6 cups of water. Cover, and just as water is boiling, turn down the heat to simmer for 10 minutes. Turn off the heat and let sit for an hour. Drain and prepare as directed below.
1. Heat oil in a  heavy bottomed pan and add potatoes. Fry until brown on most sides, remove from pan and set aside.

2. Add 2 tbl of oil and add cumin seeds, when they start to make a cracking noise, add the bay leaves, chopped onions and fry until tender.

3. Lower the heat. Add the garlic, chili's/jalapenos, turmeric powder, garam masala.

4. Add the chopped tomatoes and fry until the oil separates.

5. Add the beans and cooked potatoes, add water to cover the beans and cook for 40-50 minutes (or 10-25 mins of you quick soaked your beans).

6. Uncover and add the chopped mint leaves and simmer for another 5-10 minutes, depending on how well cooked the beans are. Add water if required. If you find there is too much water, then uncover and let boil until the amount of water has decreased.

7. Sprinkle with salt and enjoy.


Calories calculated using Sparkrecipes Calculator: 135 calories per serving

Saturday, November 12, 2011

Coconut Rice

If you are looking for a simple and filling rice and bean mixture, this dish certianly fills that want.

I was playing around with flavors tonight and after one bite, I didn't want anything else I made for dinner. My side dish became my main dish!

The coconut is subtle for those who cringe at the flavor being too strong. The basmati rice and red beans are a perfect compliment in texture. Sprinkle with a little pepper before serving and you are set.


Coconut Rice

1 tbl butter
2 garlic cloves, minced
2 jalapenos, minced (ribs and seeds removed for less heat)
1/4 teaspoon dried thyme
1/4 tsp celery salt
Coarse salt (optional)
3/4 cup canned coconut milk
1 can red kidney beans, drained
1 cup Basmati rice
2 scallions, cut
Black Pepper (optional)
1. In a medium saucepan, melt butter; add garlic, jalapeno, thyme, celery salt and 1 teaspoon salt. Cook until aromatic, about 30 seconds.

2. Add coconut milk and 1 1/2 cups water- bring to a boil. Stir in kidney beans and rice. Cover; reduce heat, and simmer until rice is tender, about 20 minutes.

3. Remove from heat; stir in scallions. Let sit, covered, until water is absorbed, 10 minutes.

4. Enjoy! Try as a side dish, with Coconut, Curry, and Lime Chicken.

Coconut, Curry, and Lime Whole Chicken

Coconut, Curry, and Lime Whole Chicken


1 whole chicken, 3-5 lbs (with skin)
1 can coconut milk
2 tsp curry powder
1 tsp cumin
3 tsp salt
2 jalapenos, cut lengthwise
1 large garlic clove, finely minced
4 key limes
1/2 large yellow onion, cut into wedges

1. Optional: The night before, remove any internal organs from your chicken, and place in a small deep pot; cover with water. Put on the lid and refrigerate until the next day. I always do this step as it ensures a moist and delicious chicken every time.

2. Take chicken and place in a deep bowl, cut deep slits into chicken breast and thighs. Rub 2 tsp salt under the chickens skin and on the breast meat. Pour coconut milk over the whole chicken and cover bowl with plastic wrap. Place in refrigerator until 2 hours before dinner.


3. Preheat the oven to 375F. Lay out your roasting pan. Place coconut covered chicken in roasting pan (breast side up or down-does not matter), discard left over coconut milk. Combine curry and cumin, sprinkle evenly all over chicken. Spread salt and place jalapenos inside the chickens cavity.


4. Squeeze the juice of limes over the chicken and place in the bottom of your roasting pan. Sprinkle garlic over the top, pushing some pieces into the cut slits of the chicken meat. Scatter onion and other jalapeno in the pan, around the chicken. Pour a little bit of water (about 1/2 cup) in the bottom of the pan. Cover with foil.


5. Roast chicken for 1 hour, remove foil and roast another 30-45 mins or until golden brown and meat thermometer registers 180F in the chicken's thigh.


6. Enjoy! Serve with Coconut Rice, garnished with roasted jalapenos.


Calories calculated using Sparkrecipes calculator: 162.8 calories per serving

Friday, November 11, 2011

Lemon and White Chocolate Scones

One of my favorite flavors is lemon. In fact, I most often will choose lemon over any other flavor. There is something about it's taste that is both refreshing and soul warming.

It reminds you of the warm sun on a summer's morning and the refreshing scent that triggers our thoughts of clean homes and fresh produce.

My lemon tree is just exploding now (yay!) and I will soon have a lot of yummy lemon posts to share once I get around too it.

My kick start recipe? Lemon and White Chocolate Scones. Yum...  


Lemon and White Chocolate Scones            Makes 8

1 3/4 cups flour
2 teaspoons baking powder
1/2 teaspoon salt
1/4 cup sugar
1 teaspoon lemon zest
1/2 tsp lemon juice
1/2 cup (one stick) unsalted butter, cut into 1/3-inch cubes
3/4 cup white chocolate chips
1/2 cup buttermilk

1. Mix sugar and lemon zest with hands until aromatic. Combine the flour, baking powder, salt, and lemon-sugar mix. Add the cut butter and mix just until coated with flour. The butter chunks should be an obvious presence, let them not be less than half their original size.

2. Add the white chocolate chips. Stir gently.  Slowly add the buttermilk and mix until just absorbed. Stop mixing when the dough begins to pull away from the sides of the bowl.

3. Pre-Heat oven to 350F. Scrape the dough from the bowl and drop by rounded tablespoons.

4. For the classic scone shape, form the dough into a ball. Pat the dough into a 7-inch disk. Cut into quarters and then again into eighths. Set the scones on a baking sheet lined with parchment paper. Bake until golden brown, about 15-20 minutes. Drizzle with your favorite glaze. I used my leftover vanilla bean glaze from my pumpkin cinnamon rolls.


Calories calculated using Sparkrecipes Calculator: 255 calories per scone

Pumpkin Cinnamon Rolls

So in my annual hunt to find new recipes for one of my favorite flavors: pumpkin, I came across the simple idea of Pumpkin Cinnamon Rolls at Taste of Home.

It wasn't a new idea, but it just hit me, that I REALLY needed to make these. Have you ever had a recipe haunt you? Well this was mine.


I took my favorite cinnamon roll recipe, added a dash of pumpkin flavors to it and topped it off with a vanilla bean glaze....ooooh.


These are seriously dangerous. I won't make these unless it's for a crowd because these can VERY easily be gobbled up by one person. And if you are inviting me over, that one person will be me. ;)


Pumpkin Cinnamon Rolls          Makes 15-20 rolls

Rolls
3/4 cup milk
2 1/2 teaspoon yeast
1/3 cup  sugar
1 cup pumpkin
1/3 cup melted butter
1 teaspoon salt
3 eggs
4- 5 cups all purpose flour
Filling
1/4 cup butter
1/3 cup brown sugar
1/4 cup natural sugar
2 tsp cinnamon
1 tsp nutmeg, fresh grated or ground
1/2 tsp cloves, ground
1/2 tsp ginger, ground
Pumpkin Glaze
2 cups confectioner's sugar
1/4-1/2 cup milk
1/2 vanilla bean
4 oz cream cheese

Instructions

1. Heat milk (either in a sauce pan or microwave) until milk begins to simmer- add butter. Let cool until a warm temperature (about 120˚).
2. In a deep bowl, add milk mixture, yeast, and sugar. Let sit for five minutes. Add 3 1/2 cups of flour, salt, pumpkin, eggs and mix until combined. Add the remaining flour, 1/2 cup at a time until the dough forms a nice ball and pulls away from the bowl. Turn out the dough onto a clean surface and knead the dough until smooth and elastic- at least eight minutes.
3. Grab a clean separate bowl, lightly spray the dough with cooking oil and place in a warm draft free spot until dough has doubled in size (around an hour and a half.)
4. Turn the dough out onto a lightly floured surface and roll out into a 10 by 14 rectangle.


Rub room temperature butter over entire surface and cover with sugar and spice mixture (if it has the words sugar and spice in it, you know it's going to be good!). Roll the dough into a log. Cut into 12-16 1 inch thick pieces. Place in a sprayed pan. I would suggest a 9x13 pan. I myself don't have a pan that big, so I used an 8x8 and a 7x11 pan for 15 rolls.

5. To cook for breakfast the next morning: Cover pans with plastic wrap and place in refrigerator overnight. If you want to continue on, cover and let rise in a warm place for another hour and follow with remaining instructions.

6. The next morning, preheat the oven to 350˚ and remove cinnamon rolls from the fridge and let sit on top of the warm oven to warm and rise to the size you'd like. Mine took longer then I thought, about an hour.

7. Bake for 20-25 minutes until cinnamon rolls are a nice golden brown color. Let cool slightly.
8. While cinnamon rolls bake, take out a small sauce pan and pour in milk. Scrap seeds out of vanilla bean and add to the milk, add vanilla stem too. Cook on low, being careful not to let the milk steam or boil. When the milk begins to smell aromatic, like vanilla turn off the heat. Meanwhile, whip cream cheese until soft and creamy. Mix in sugar slowly until combined. Remove vanilla stem, throw away. Slowly add milk mixture to sugar and cream cheese.

9. Once rolls are out of the oven and while cinnamon rolls are still warm, spoon icing over the rolls. Enjoy while warm (as if there is such a thing as cold cinnamon rolls!)


Calories calculated using Sparkrecipes Calculator: 266.7 calories per roll, with two tablespoons of glaze on top