Showing posts with label homemade. Show all posts

Monday, November 21, 2011

Pizza Dough

If you have never made homemade pizza, this should be one of your top things in your home to make homemade. I've seen women bloggers out there making their own vanilla extract, yogurt and everything in between, so why not more pizza? 

What seems like a speciality food only professionals can do is not true. You CAN do this!


Homemade pizza is always outrageously delicious. It does not take a lot of your time, total of 2 hours prep/cooking (if your making a meat topping, less if it's all veggie). Plus, it's a fun family project to do together. I had kids of all ages helping me and sure enough, everyone gobbled this pizza up like it was going out of style. Even those kids that cringed at the site of anything green, they ate it, spinach and all.

To make a good pizza, you need to start with a good crust.


Pizza Dough                                        Serves 4

2 1/4 tsp active dry yeast
1 c water, (105-110 F for active dry)
2 1/2-3 c bread flour or all purpose flour
1 tsp salt
olive oil

1. In a small cup, dissolve yeast in water. In a large mixing bowl, stir together 2 1/4 C flour and salt. Add yeast and stir until smooth. Let the dough rest 10 minutes.

2. Knead the dough until the dough approximately 10 minutes until the dough becomes elastic and smooth. This dough will be soft and a little tacky, so resist the urge to add too much flour.

3. Place the dough back in the bowl, coat with a bit of olive oil and cover with a towel. Let rise in a warm place until doubled in size, approximately 1-1 1/2 hours.

4. Using a cookie sheet or pizza pan, roll out to:
  • 4- 4 in individual pizzas
  • 2- 8 in pizzas
  • 1- 14 in pizza
Pre-heat oven to 425F. Cover rolled out dough with a towel again and let rise 15 minutes for thin crust, or 30 minutes for a softer crust.

5. Top with your favorite sauce and toppings. Bake 10-15 minutes or until dough crusts are golden brown.


Pictured above, my pizza is mozzarella cheese, spicy sausage, onion, tomato, and spinach.

Calories calculated using Sparkrecipes Calculator: 348 calories for two slices 

Saturday, November 5, 2011

Jalapeno Eggrolls

You ever shop through the market and look around, when something stops you and says "I'm interesting! Make me something yummy!"

Or, is that just me?

Don't judge, it's been working for me :)

The other day I saw jalapenos on sale. They were in season and I got about 20 for $2.00! Yeah!

Yesterday I made amazing jalapeno honey spareribs.

Tonight, I was craving jalapeno poppers, but was interested in how I could play with the idea and my other market impulse buy, egg roll wrappers....

Thus, the Jalapeno Egg roll was born!


Attention! If you are dieting, these babies are high in the caloric snack world. I ate four as a dinner substitute and was completely satisfied.

I'm not saying you SHOULD eat all of these by yourself, but it is kind of hard to stop. So maybe save this appetizer when there are more people around to share them with.


Jalapeno Egg Rolls                                Makes 8 rolls

8oz Cream Cheese
6 jalapenos, seeded and diced
1 tsp garlic paste
1 tsp ginger paste
1 tbl cumin

8 Egg roll wrappers
sesame oil

1. Pre-heat oven to 400F or deep fryer ready (I don't fry foods, but an egg roll classic way to fry is to get the oil temperature to 375F). Mix all filling ingredients together until creamy.


2. Lay wrapper in a diamond shape, with a point towards you. Fill with 1-2 tablespoons of filling.


Fold and roll up in the shape of an egg roll, place on a baking sheet. Brush with oil (skip the oil if frying these). Never stack your egg rolls before or after you cook them or the filling will seep out.


3. Bake for 15mins or until brown.


4. Enjoy!

Calories Calculated by SparkRecipes Calculator: 107 calories per serving

Tuesday, November 1, 2011

Soft Pretzels

Last night I was bored and was in one of those snacking moods. But because I'm trying to be good, I make snacking harder to do. I don't just grab anything, I make myself make my snack and perhaps in the process I won't think it's worth the effort and will give up.

Well I got in my mind I wanted one of those big, soft pretzels with a sprinkling of course salt (yum!), so I set out how to make them.

I looked at a few recipes and modified them to make my own, and let me tell you, these pretzels were worth the effort. Even if you're not familiar with how to make bread, these are relatively easy to make and they turned out delicious.

I would love to make these again with my nieces. It's like working with playdough and you can make any fun shape you want!


Soft Pretzels                          Makes 10-15

1 1/2 cup warm water
1 1/8 tsp. active yeast (1 1/2 pkg)
2 Tbs. brown sugar
1 1/8 tsp. salt
1 cup bread flour
3 cups regular flour
2 cups warm water
2 Tbs. baking soda

To taste coarse salt
2−4 Tbs. butter (melted)

1. Sprinkle yeast on lukewarm water in mixing bowl; stir to dissolve. Add
sugar, salt, and stir to dissolve; add flour and knead dough until smooth
and elastic. Let rise in a warm place at least 1/2 hour.

2. While dough is rising, prepare a baking soda water bath with 2 cups warm water and 2 Tbs. baking soda. Be certain to stir often.

3. After dough has risen, pinch off half a handful or more of dough and roll into a long rope (about 1/2 inch or less thick) and shape. There is a great tutorial here on how to get that classic twist shape. Dip pretzel into soda solution and place on greased baking sheet. Allow pretzel to rise again.


4. Bake at 450F for about 10 minutes or until golden. Brush with melted
butter and enjoy!


Toppings:
After you brush with butter try sprinkling with coarse salt. Or try melting a stick of butter in a shallow bowl (big enough to fit the entire pretzel) and in another bowl, make a mixture of cinnamon and sugar. Dip the pretzel into the butter, coating both sides generously, then dip into the cinnamon mix. Let dry and enjoy.

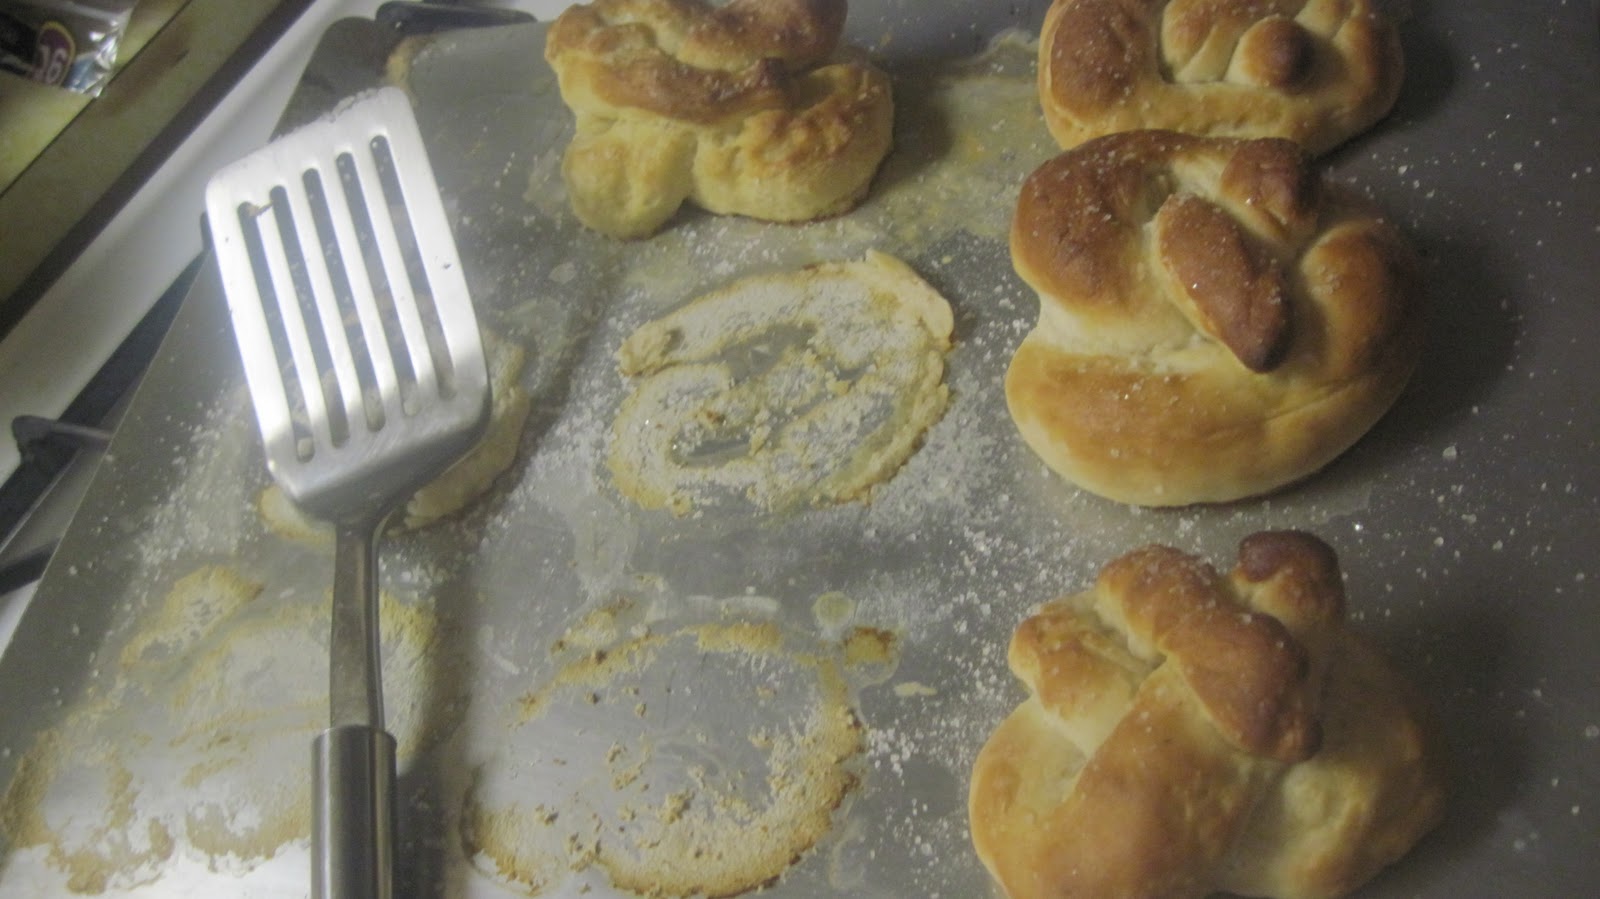
I woke up this morning to find this. I guess someone else liked these too!

Sunday, October 30, 2011

Pumpkin Party

Fall is here and it's the perfect time to get your friends together; have great food and enjoy each others company.

I have what I have so lovingly call "The Party Curse." See I love to entertain and host, but the people I invite either end up going out of town, family matters, or my party coincides with flu season (even my own wedding was sparse!)

Alas, the same thing happened this time. My best friend, her sister, and her daughters came, which was great, but not what I had planned for.

So, here is my party set up to help give ideas if anyone else is thinking of throwing a Pumpkin Party next year. Who knows? Maybe I'll put myself through this again and it will be different.

Pumpkin Party Intimate Get Together 2011


Decorations

I borrowed a long table from my local church and set up two working tables, one for adults/older kids and one for younger kids.

I had a left over tablecloth roll from my sons birthday so I covered all the tables in that. My mom is a teacher so I went to her school and took about 6 feet of orange paper. I cut that to make a runner to go down the middle of the table. Then I had two pumpkin luminaries which I placed pumpkin carving tools inside.


I also had two bowls available for pulp and seeds.


The kids table was my sons work table, covered with table cloth. I set out tempera (washable) paints, brushes, disposable plates and some push in decorations for the non-carving table. 

The backyard so far...


Besides the tables I also made a pumpkin pennant which I posted about here, and these adorable corn husk pom-poms


I got this idea from one of my favorite blogs CentsationalGirl, she gives a good tutorial on her page here.


Food

The party was in the afternoon, so I only served munchie foods.

Dish 1: Apple slices and Pumpkin Dip. 
The apples were served with the cores cut out using a mini cookie cutter. Served alongside with a pumpkin dip. This went the fastest, between my family coming by and munching, I was out of apples and dip :) 
I got about 5-6 slices from each medium fuji apple, then they took a bath in some pineapple juice. I wrapped them up and put them in the fridge a few hours before the party.

Pumpkin dip
8oz cream cheese
1/4 c brown sugar
15 oz pure pumpkin
spices to taste (ginger, cinnamon, cloves)

Cream together ingredients until smooth, place in serving container and chill at least an hour before serving. Also great with gingersnaps, carrot sticks and honey pretzels.


Dish 2: Veggie Tray. Easy. Simple.


I took a wide, clear platter and spread out a 16oz bag of baby carrots. Sliced up some cucumber eyes, a celery stalk for a stem and snap peas arranged in the shape of a mouth.

Dish 3: Pumpkin Empanadas


I made these about 2 weeks ago and just popped them into the freezer. I took them out the night before and they were just as good. I'll post a recipe for these soon.

Dish 4: CROQUEMBOUCHE
or literally, “crunch in the mouth”. This piece is the traditional wedding cake in France, and is often served at baptisms and communions as well. The classic piece montée is a high pyramid/cone made of profiteroles (cream-filled puff pastries) sometimes dipped in chocolate, bound with caramel, and usually decorated with threads of caramel, sugared almonds, chocolate, flowers, or ribbons.

I had been waiting to do something big and fun and DIFFERENT, so I attempted the CROQUEMBOUCHE (I love saying it). I filled mine with a custard, which is traditional for most creme filled desserts, and of course mine had to be pumpkin for my pumpkin party. I found a pretty good recipe here.

I doubled my recipe and made two batches, one of just pumpkin and one of pumpkin-chai (this one is a winner). I'll post a recipe of my adventures in this piece later too.

Snack Table
Games

Because the bulk of the party I figured was going to be for carving pumpkins, I didn't want to go overboard by planning a lot of games. But I did make one easy one, kids of all ages enjoy (even if they say they are too old for those kid games).

Pin the Nose on the Pumpkin


I bought a poster board from the dollar store and cut out a pumpkin from the orange paper I brought home from school. Then out of black card stock I cut out a mouth and eyes then made about 12 noses or so (more or less depending on how many kids are playing). Keep a blindfold or a sleeping mask handy and you're ready to play.

What does the winner get to take home?

This Pumpkin trophy!

Ding! Ding! We have a Winner!

I bought a small fake pumpkin at Micheal's Crafts and carved "Winner" into it, then filled it with candy. I love it. It's a memorable prize and it's a pumpkin!

Because I only had two kids at the party (my son and my friends daughter, both 2 yrs old) I gave my game and prize to my mom who is a teacher so she can use it in her classroom on Halloween.

Goodie Pumpkins

Finally, before everyone leaves, they were to take home a goodie pumpkin basket. I found these babies at a yard sale, I grabbed all 20 for $5!

Each one was to be filled with some candy, a pumpkin scented candle (dollar store) and....


Once everyone gutted their pumpkins and they gave me all their seeds, I was going to wash, dry, spice, and bake them while they carved their pumpkin faces. Then I had some small candy wrappers on hand to wrap them up so everyone could take home a pumpkin treat from their own pumpkin!

I thought it was a nice personal treat. Alas, my friend who did come didn't want her seeds so I still have them. I'll post that recipe later.

At the end of the day, I was tired; but I had this to show for it.


In some small way, it's goofy, smiling face makes me feel better about my "party curse." There is always another holiday or birthday to plan for and get together.


Friday, October 21, 2011

Rootbeer Marinade

I really have been enjoying this "take anything you have in your house and see what you can come up with for dinner" plan. Tonight, I was planning on making fajitas.

Let me begin this post by saying, I LOVE fajitas! I can eat them everyday if I was allowed. They are nutritious, simple, quick, and above all delicious! Plus, they fit perfectly into my no processed foods plan this month.

Well, tonight (last minute) I decided my good ole' fajita recipe wasn't going to do. I needed to mix it up a bit. My solution came with my next question.

What else was I in the mood for? Root beer! I had one bottle left of the best (I repeat BEST) root beer in the world. Henry Weinhard makes more then just beer, his root beer is amazing. I had planned on drinking my last one with my fajitas, but....

I thought, what the heck. People make marinades out of beer, why not root beer? So I made the sacrifice and shared my rootbeer for an experimental marinate.

I remember making root beer in Biology class. It was really fun and I remember discussing how the yeast will carbonate and fermentate the mixture giving it that bubbly signature.

Knowing this, I knew my meat would be nice and tender letting all those bubbles go to work paired with sassafras and sugar (yum!).

This is what I came up with. We enjoyed our dinner, fajita style.


Root beer Marinade
Weinhard bottle caps amuse me
1 Twelve Ounce Bottle Of Henry Weinhard's Root Beer
1/4 cup Teriyaki or Soy Sauce
1/2 cup Vegetable Oil
6 garlic cloves, minced
1 inch, ginger root, minced
1 tsp Black Pepper
1 tsp Crushed Red Pepper Flakes

2 lbs of skirt steak, boneless chicken or pork lion cut into 2 in strips


Fajita style serve with: 1/2 large yellow onion, 1 green and yellow or red bell pepper sliced and sauteed in a tsp of oil. Warm 6 in corn tortillas.


Instructions:
 
1. Get a gallon sized, plastic, zippable bag. Mix all the ingredients together. Add the meat and seal the bag. Mush it around a little and place bag in a medium sized bowl.
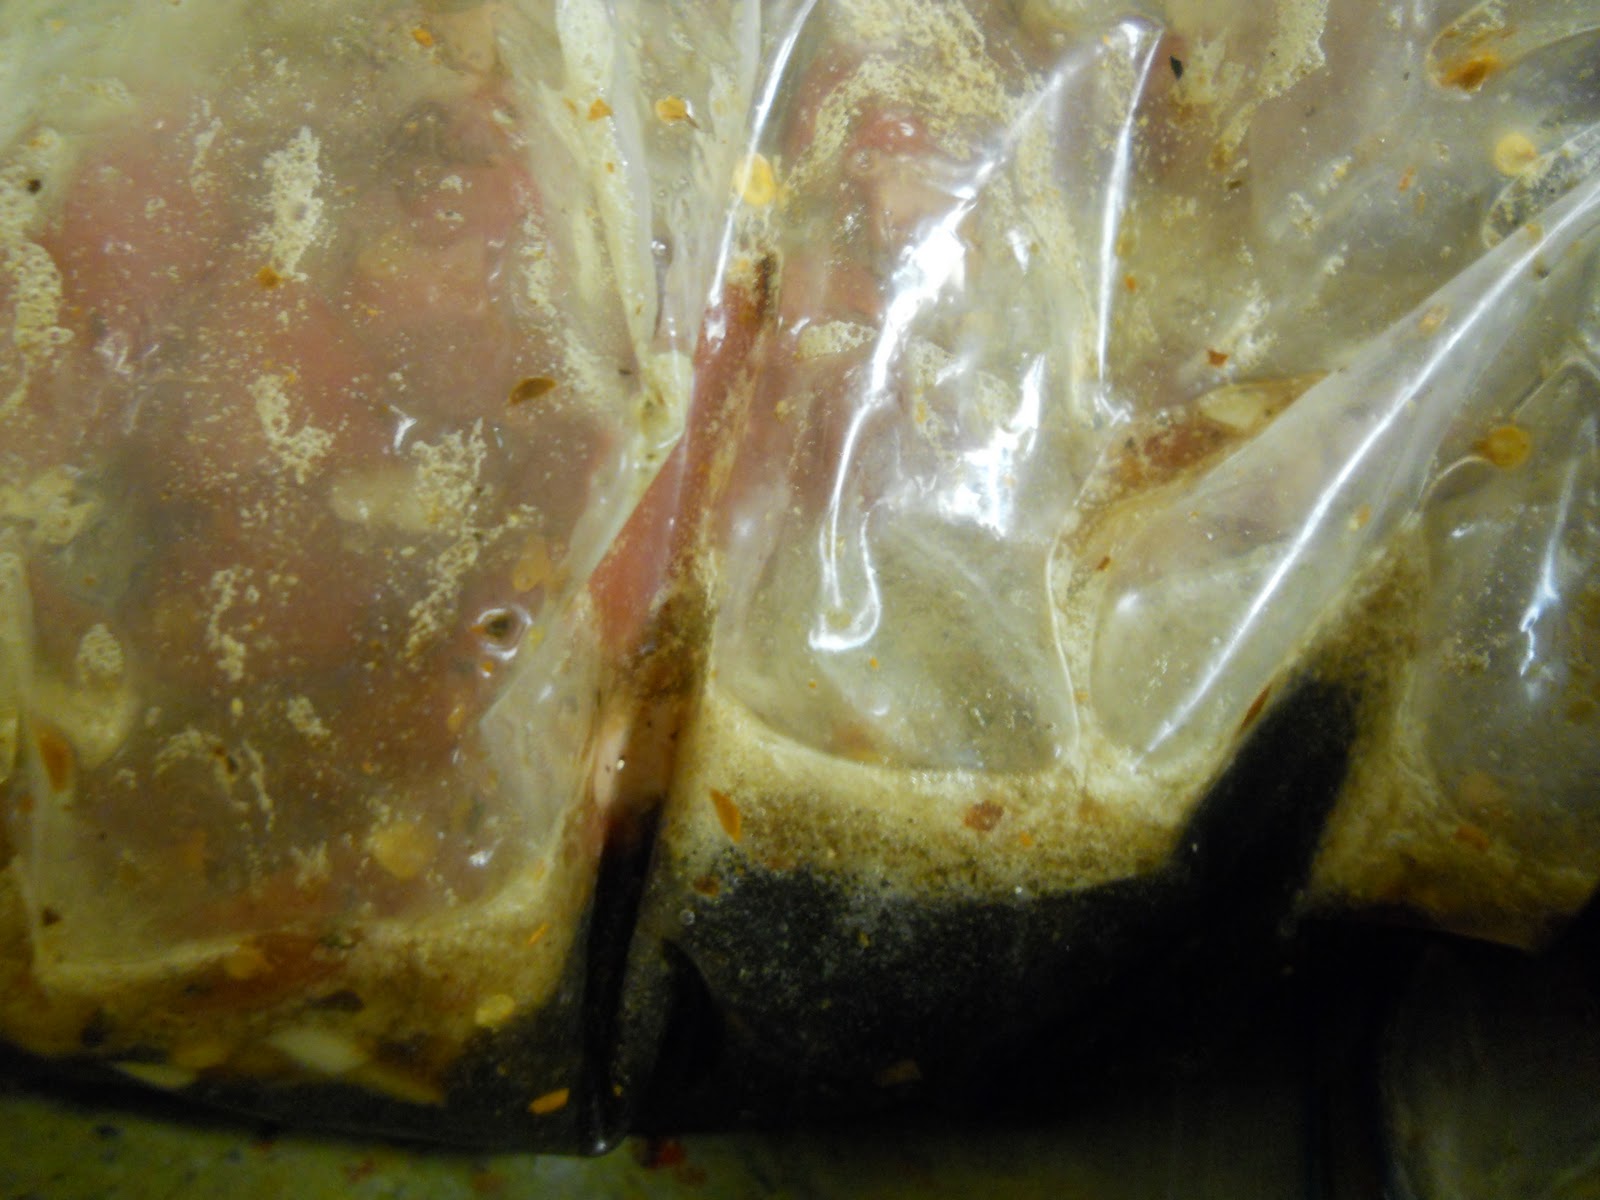
2. Let marinate 2 hours or overnight (I am a fan of overnight marinating)
mmm...foamy bubbles
3. Remove meat, grill, enjoy.
Obviously, I broke my no processed food rule with this marinade by including root beer. But you can always one up me, MAKE your own root beer!

Do it! And then leave me comments how that went, I'd love to know.

Thursday, October 20, 2011

Pumpkin Chai Ice Cream

I had some left over pumpkin from the pumpkin-lavender bread I made almost 2 weeks ago, and I needed to use it fast or I would lose it.

I had just made Lavender Ice Cream last night, so I thought I should use this pumpkin and make Pumpkin-Chai Ice Cream (it's more like soft serve since I'm not making it like real ice cream).

I have to say this ice cream is delicious. If your looking for a pumpkin ice cream recipe, this is it. Within 10 minutes half of my ice cream was gone after I gave some taste tests to my family!

They rated it "20 out of 2 thumbs up" :)

Pumpkin Chai Ice Cream
2 cups milk
1 tsp vanilla extract
3/4 c sugar
1 c heavy whipping cream
1 c canned pure pumpkin
1 tbl molasses
1/2 teaspoons ground cinnamon
1/4 teaspoon ground nutmeg
1/4 teaspoon ground cloves
1/8 teaspoon ground cardamom
1 bag of Vanilla Chai Tea (Bigelow)
Pinch of salt
1. In a large bowl combine the milk, sugar, vanilla. Stir until combined and sugar is dissolved. Mix in heavy cream. Cover bowl and let sit in the refrigerator overnight.

2. In another bowl combine pumpkin, molasses, salt, all the spices, and half the chai tea bag contents. You can add all of it, but I think it would be too strong. Mix well. Cover bowl and let sit in the refrigerator overnight.

3. When ready to make ice cream, mix the two bowls contents together and freeze according to your manufacturers instructions.
ten minutes later...

Vanilla Lavender Ice Cream

Tonight I wanted ice cream. But, I had a problem to meet this need.

I made a promise not cook anything processed this month as part of the Eating Rules! October Challenge. I would say the transition hasn't been hard, I like to make everything from scratch anyways.

But tonight I wanted ice cream! How to you fulfill a need like that last minute when it's so easy to grab your car keys and head to the store? I decided I was going to be good and buck up. I will make my own ice cream.

I've made it before. I have the technology (ice cream maker canister already waiting in the freezer). So, let's do this! Time to be creative.

I started with what I knew, Vanilla Ice Cream and just added a twist of lavender since I'm sort of on a lavender kick right now. I think my next try might be more seasonal...pumpkin? :)


Vanilla Lavender Ice Cream

1 1/2 cups whole milk
3/4 cup lavender sugar (I had some left over from my pumpkin-lavender bread)
2 tbl dried lavender (if you do not have lavender sugar. Please make sure  your lavender is for culinary use only! Not from a craft store or out of your potpourri)
Pinch of salt
1 tbl vanilla extract or 1 vanilla bean
1 cups heavy cream
5 large egg yolks


1. If using vanilla bean, cut open and scrape out the seeds.

2.Warm the milk, lavender sugar, vanilla bean seeds and pod and salt in a medium saucepan until sugar dissolves, do not boil. If you are using vanilla extract, add to milk once it's warmed to 170F.

A lot of recipes have you strain the flowers out of the warm creme, but I left my lavender in the ice cream to add color and keep the full flavor, they are edible flowers after all.

Remove the lavender and vanilla bean pod (if using) then discard if you want a really smooth ice cream.

3. In a separate medium bowl, whisk the egg yolks. Slowly pour a small amount of warm milk mix into the egg yolks, whisking constantly, then scrape the warmed egg yolks back into the saucepan.

4. Stir the mixture constantly over medium heat with a heatproof spatula (Do not use a whisk, it will add too many air bubbles to the ice cream), scraping the bottom as you stir, until the mixture thickens and coats the spatula (Congrats! You just made curd!).

5. Pour the custard through the strainer (just in case any eggs decided to cook on you on the bottom of the pot) and stir it into the heavy cream. Let mixture cool at least an hour, overnight is best.

6. Freeze the mixture in your ice cream maker according to the manufacturer’s instructions.

Your ice cream maker won't freeze the ice cream as well as the old fashioned ice and rock salt machines. Remember! If you let the ice cream maker continue to run longer than 30 minutes, the ice cream will begin to melt again. So just turn it off and finish freezing in the freezer.

Tuesday, October 18, 2011

Pumpkin Pennant

I'm hosting a pumpkin party at my house in a few weeks. "A Pumpkin Party? What is that?" you say. Well...basically its an excuse to hang out and have a party. I know most people go out on Halloween and I am NOT a Halloween party person- I am a Fall person. But that doesn't mean I can't find a way to combine them!

A Pumpkin Party at my house means: Come over, BYOB (bring your own pumpkin), eat pumpkin tasting goodies (will post more later) and carve your pumpkins at my house. I deal with the pumpkin mess, kids can have fun with a few simple games, and adults can spend time together laughing and probably taking over their kids carving :)

I'll be gone for a week right before the date, so I have started making decorations. A few weeks ago I walked around Target and picked up some plates that I thought were cute and that sort of set my party color scheme right off: Orange, Black, Brown and this Teal Blue <3.

Anyways...if your coming to the party, this is a spoiler. You get a look at what is to come (so maybe you'll be more excited to come!).

Pumpkin Pennant

Materials Needed

printer paper
pencil
ruler
scissors
1/2 yard sturdy fabric, I used burlap
approx 3 glue sticks
glue gun
newspaper
10 ft twine, ribbon, yarn etc...
Various color-complimentary scraps of fabric. You can also buy some pre arranged coordinating fabric at any craft store area: Walmart, Micheal's, Hobby Lobby...
small pumpkin cookie cutter
Stitch Witchery (optional)
needle and thread (optional)

1. Take 1 piece of printer paper and fold in half like a book. Using your ruler and pencil make the size pennant you would like. I made mine 5 1/2" wide by 7 1/2" long. Cut out template and trace on fabric. Cut pennants out.
2.  I cut out 12 pennants. I did the math to calculate a good foot length for my garland. 5.5 (pennant width) x 12 (cut out)= 66in. or 5.5 feet so far.

I wanted my pennant to have some hanging room so I added a foot to each end making it now 7.5 feet (90 in).

Lastly, I wanted the pennants to be evenly spaced so I figured I could round out the garland to 10 feet. 10-7.5=2.5feet or 30in. 30/12= 2.6 inch spaces between pennants.

Long story short, cut your twine 10 ft long if you want it like mine, otherwise you can do your own math.

3. Plug in the glue gun, lay out newspaper. Measure 12 inches of twine (or whatever your using), mark with pencil. Lay pennant under twine and add a zig-zag across the top. Line up mark at end of pennant, fold fabric over twine, pinch with fingers until set. If you are using burlap, I would suggest you get a cold glue gun so you don't burn your fingers as the glue may squeeze through.

4. Measure out 2.6in, mark and repeat until you have glued all your pennants to the twine. If you want some added cuteness and security, sew a running stitch through the folded fabric.

5. Get out your scraps, get comfortable, and trace. Trace 12-36 pumpkins (it's up to you how many you want to cut out and glue on pennants). I wanted a good variety of different shapes and sized pumpkins. Nature doesn't come in just one shape and size...so I found a lot of different kinds online and traced them right off my screen. If you want the same pumpkins that I used, I have a PDF file you can print out here.

Now cut out your pumpkins. You should have a nice variety of eclectic pumpkins.

6. Lay out your garland, and arrange pumpkins in a way you like. Hot glue them in place (or use some stitch witchery and iron them in place). Again, added cuteness/security, put a running stitch on pumpkins in contrasting colors.

7. Hang and get ready to make the next party decoration!

Friday, October 14, 2011

Homemade Paneer

Continuing with my Indian cuisine curiosity, I was kind of interested in paneer. The stuff seemed to be every dish, what is that stuff? Now, mind you, I have never even eaten at an Indian restaurant, so I am finding these things out all on my own.

Paneer is a fresh cheese that doesn't require aging and doesn't melt! Reminds me of Mexican Queso Blanco (yum!), Now that I'm familiar with.

Apparently, Paneer...is very common and so simple, that I figured I could make this stuff at home. Looking for a recipe, I did short research and you only need two ingredients! What? A protein substitute with two ingredients?

Fabulous!

I made my paneer today and will use it tomorrow, recipe to follow!

Also, if you haven't noticed on my blog, I have taken the October Unprocessed Pledge. I pledged to not prepare any meals with processed foods. Check it out here and take the pledge too, it's never too late!

Here we go...

Paneer            Serves: 2

8 c whole, 2% or 1% milk (higher milk fat means more curds)
Juice from one lemon or lime (2 tbl)

Tools:
Sauce pan AND heavy bottomed pan
thin clean cloth or cheesecloth
tall pitcher or bowl
wooden spoon


1. Grab a wide, big pot and pour in your milk. Heat until hot, but not boiling.


2. Add your juice and stir just a little, you should see right away some curdling (that means the acid is working). Let milk continue to cook on med for about 10 mins. Don't over stir your milk, just check it every few mins to move your curds to the side.

3. Once the curds separate from the whey (the liquid remaining after milk has been curdled), the whey should turn a slightly green tinged color.

I was surprised how little cheese you get out 4 cups of milk! But again, you just want the curds, the milk fat for your cheese.

4. Place your cloth/cheesecloth in a colander or bowl, making sure corners are hanging over the edges; pour curds and whey into cheesecloth. Grab corners and tie together. Lift and let hang inside a pitcher to drain about 5 mins, press out whey.


5. Move your paneer and place on a flat surface, place a heavy bottomed pan on top and let sit for another 5-10mins. This will help set the cheese to stay firm so you can slice or cube it later. If needed, squeeze any more remaining whey.

I had to squeeze more out

6. Mine made about 1-2 cups. Refrigerate until needed or just enjoy.


Servings: You can fry it, kabob it, bake it, eat it fresh, crumble it on top of dishes, salads...this cheese works hard to be useful, frugal and good for you!

To many, this cheese is a lot like Greek feta. If you hate feta (Like I DO): because it's bitter and just gross; you will like Paneer. It's neutral and reminds me somewhat of tofu, just waiting to soak up flavors of any dish you add it too.

Wednesday, October 12, 2011

Vanilla Chai Pumpkin Doughnuts

I LOVE pumpkin. Like most bloggers about this time of the year, we feed off of each others creativity and passions to feed our own. The most popular food to be blogging about in the Autumn? Pumpkin of course.

I had a calling yesterday as soon as I read about this marvelous invention: the Pumpkin doughnut (doesn't that just sound amazing?). I immediately started making a list in my mind of what foods and tools I needed. I knew I had to make these soon. I actually made them tonight. Started frying those babies up at 12:30am, I just couldn't wait until morning!

Now, I don't fry foods. Ever. It's unhealthy and the people in my house just cringe at anything crunchy/fried. But these are doughnuts! These little balls of dough puff up into something wonderful and soft and NOT feeling fried at all. I was actually kind of nervous about it. I hot vat of scalding oil that I get to stand in front of and drop dough so it could splatter back up? Mmm...not so fun sounding, but the reward was tempting so it's OK, this one time....:)

I adapted this recipe to also include some of my other favorite things: MORE pumpkin flavor, MORE spices and my all around favorite Chai tea. I add chai to alot of recipes and it almost always turns out tasting amazing and looking amazing. So here you go, my first time making doughnuts and they do not disappoint.


Vanilla Chai Pumpkin Doughnuts
(adapted from Pinchmysalt.com, originally from Bon Appétit)

3 1/2 cups all-purpose flour
4 teaspoons baking powder
1/2 teaspoon baking soda
2 teaspoons salt
2 teaspoons ground cinnamon
1 teaspoon ground nutmeg
1/2 teaspoon ground cloves
1/4 teaspoon ground cardamom
1 cup sugar
5 tablespoons unsalted butter, at room temperature
1 large egg (or 1 tbl flax seed and 2 tbl water)
2 large egg yolks
1 teaspoon vanilla extract
1 bag of Vanilla Chai Tea (Bigelow)
1/2 cup milk
1 tablespoon molasses
2 cups canned pure pumpkin
Canola or Peanut Oil (for deep-frying)

1. Combine first 9 ingredients (flour through cardamom) in a medium bowl to blend well; set aside. Pour milk into a microwavable bowl and heat about 1 minute to warm. Seep tea bag into milk and let stand about 3 mins.

2. Using an electric hand mixer or stand mixer, cream sugar and butter in large bowl until well blended. Beat in egg, then yolks, then vanilla. Gradually beat in chai milk and molasses, then beat in pumpkin. Open tea bag and pour in all the contents to the dough.

3. Gradually add the flour mixture into the egg mixture in 4 additions, blending gently after each. Cover the bowl and chill in the refrigerator for at least three hours.

4. Lightly flour two baking sheets. When dough is well-chilled, lightly flour a work surface. Starting with about 1/3 of dough, gently press it out to a round that is 1/2- to 2/3-inch thick. Using a 2 1/2-inch-diameter round cutter, cut out dough rounds. Using 1-inch-diameter round cutter, cut out center of each dough round to make doughnuts and doughnut holes. Arrange doughnuts and holes on the baking sheets as you go.

I had an image of me just eating doughnut holes; something I can just pop in my mouth and enjoy. I also wanted something easy to give, and holes are a easy way to pass on the blessings.

But play around with your cookie cutters, all shapes do well as long as they are no bigger then 2in.

Gather dough scraps. Press out dough and cut out more dough rounds until all dough is used. If dough is very sticky (and it will be), dip the round cutters into flour before cutting each doughnut.

5. Line two baking sheets with several layers of paper towels. Pour oil into large deep skillet or dutch oven to a depth of 1 1/2 inches. Attach a deep-fry thermometer to the side of the pot and heat oil to 365°F to 370°F. Fry doughnut holes until golden brown, turning occasionally, about 2 minutes. Using a slotted spoon, transfer to paper towels to drain. Fry doughnuts, 3 or 4 at a time, until golden brown, adjusting heat to maintain temperature, about 1 minute per side. Using a slotted spoon, transfer doughnuts to paper towels to drain. Cool completely.

6. Top with any glaze or sugar, or just pop them warm in your mouth.

Make sure to watch the color of your doughnuts, they will let you know when they are done.

Here is my first batch:
Not cooked long enough :( They were golden brown, but still gooey inside.

Lesson Learned:
Cooked just right :) Soft and cake like. These will be darker on the outside (approx 2 mins)

I played around with different toppings for the doughnuts, here is what I tried:

1. Spiced Orange Glaze: 1 c confectioners sugar, 1/4 c orange juice, 1 tsp vanilla, 1/4 tsp nutmeg AND cinnamon. Combine until smooth, drop and coat doughnut holes, let dry. You can also try using apple juice which is very good on shortbread cookies, I just didn't have any today to try it.

Score: 4/5. The glaze is amazing and makes these lil' babies super moist and sweet.

2. Sugars: Mix 1 c sugar, 1 tsp cinnamon, 1/8 tsp nutmeg. Roll doughnuts in mixed sugar.

Score: 5/5: I loved this combination. Classic and simple for all the sugars.

3. Sugars:  Lightly dust with confectioners sugar

4. Plain :)

5. Vanilla Glaze: 1 c confectioners sugar, 2 tsp vanilla, 1 tbl milk. Combine until smooth, drizzle over doughnuts. How awesome would this be if I used a vanilla bean?

Score: 5/5: This was perfect if your glaze isn't too sweet and is nice and vanilla-y (it's my word). You can really taste the pumpkin, yum!

6. Chocolate Glaze: 1 c milk, 2 oz dark melting chocolate, 1 tsp confectioners sugar, 1/2 tsp vanilla. This is more of a chocolate sauce, but I dipped the doughnuts into it and let it set.

Score: 1/5: I don't like pumpkin and chocolate. But, I gave it a try again anyways (for science). I still stand by my first statement.

Other ideas: caramel glaze...

Mix in varieties: cranberries, raisens, chopped onion, cheesecake, herbs

Serving:

I made a paper cone, filled it with holes and gave it to my 2-year old to walk around and eat
Mommy had her's with hazelnut coffee


Other shapes I tried:

Leaves

Hearts


Good Ole' Fashioned Doughnuts
 
See the speckling of tea and spices? <3


This was a fun project and I might make these again since they are really good, but...again, not a fan of frying things. We'll see. Hope you try this at least once.

Put it on your Bucket List right now before you forget.