Showing posts with label cheese. Show all posts

Friday, August 3, 2012

Chorizo, Bean and Cheese Empanadas with Egg Sofrito

I was torn between making Huevos Rancheros for dinner and making something new. 

So....I made a new version of Huevos Rancheros! Instead of a crispy tortilla, you have a cheesy, spicy empanada insead.

 
Chorizo, Bean and Cheese Empanadas with Egg Sofrito

Serves four dinners, plus four extra for freezing/lunch


To make the pastry                                                                               

4 c wheat flour
1 tbl sugar
1/2 tsp nutmeg
1/2 tsp salt
1 1/2 sticks (6oz) COLD butter
2/3 c COLD water
2 tbl white vinegar
2 egg

1. Combine flour, sugar, nutmeg, and salt with a whisk. Using your hands or a pastry blender, cut in the butter until mixture is crumbly.

2. In a separate bowl, whisk vinegar, eggs, and water, slowly add liquid to the dough; kneading gently until combined. Wrap in plastic wrap or a damp towel and place in the fridge until needed.

For the filling
 
1 c chopped chorizo
2 c cooked pinto beans
1 onion, diced fine
2 green chilies/jalapenos, minced
2 cloves of garlic, minced
1/4 tsp paprika
1/2 tsp cumin
1/2 tsp fresh coriander leaves
1/4 lb. of shredded cheddar cheese

1. In a saute pan, add chopped chorizo and dry fry on low. Don't worry about adding oil, as the chorizo will release its own grease and crisp the pieces up nicely; approximately 8 minutes. Remove from pan and drain on paper towels.


2. Add onion, chilies and garlic to remaining chorizo grease, saute on low until onions are soft. Add beans, spices, and a splash of water; let beans fry for 10 minutes, scraping the bottom of the pan and mashing beans occasionally; adding more water to prevent them from burning.
 
3. Mash the beans once tender until they resemble thick mashed potatoes. Stir in cheddar cheese, coriander leaves and chorizo. Let mixture cool 30 minutes.


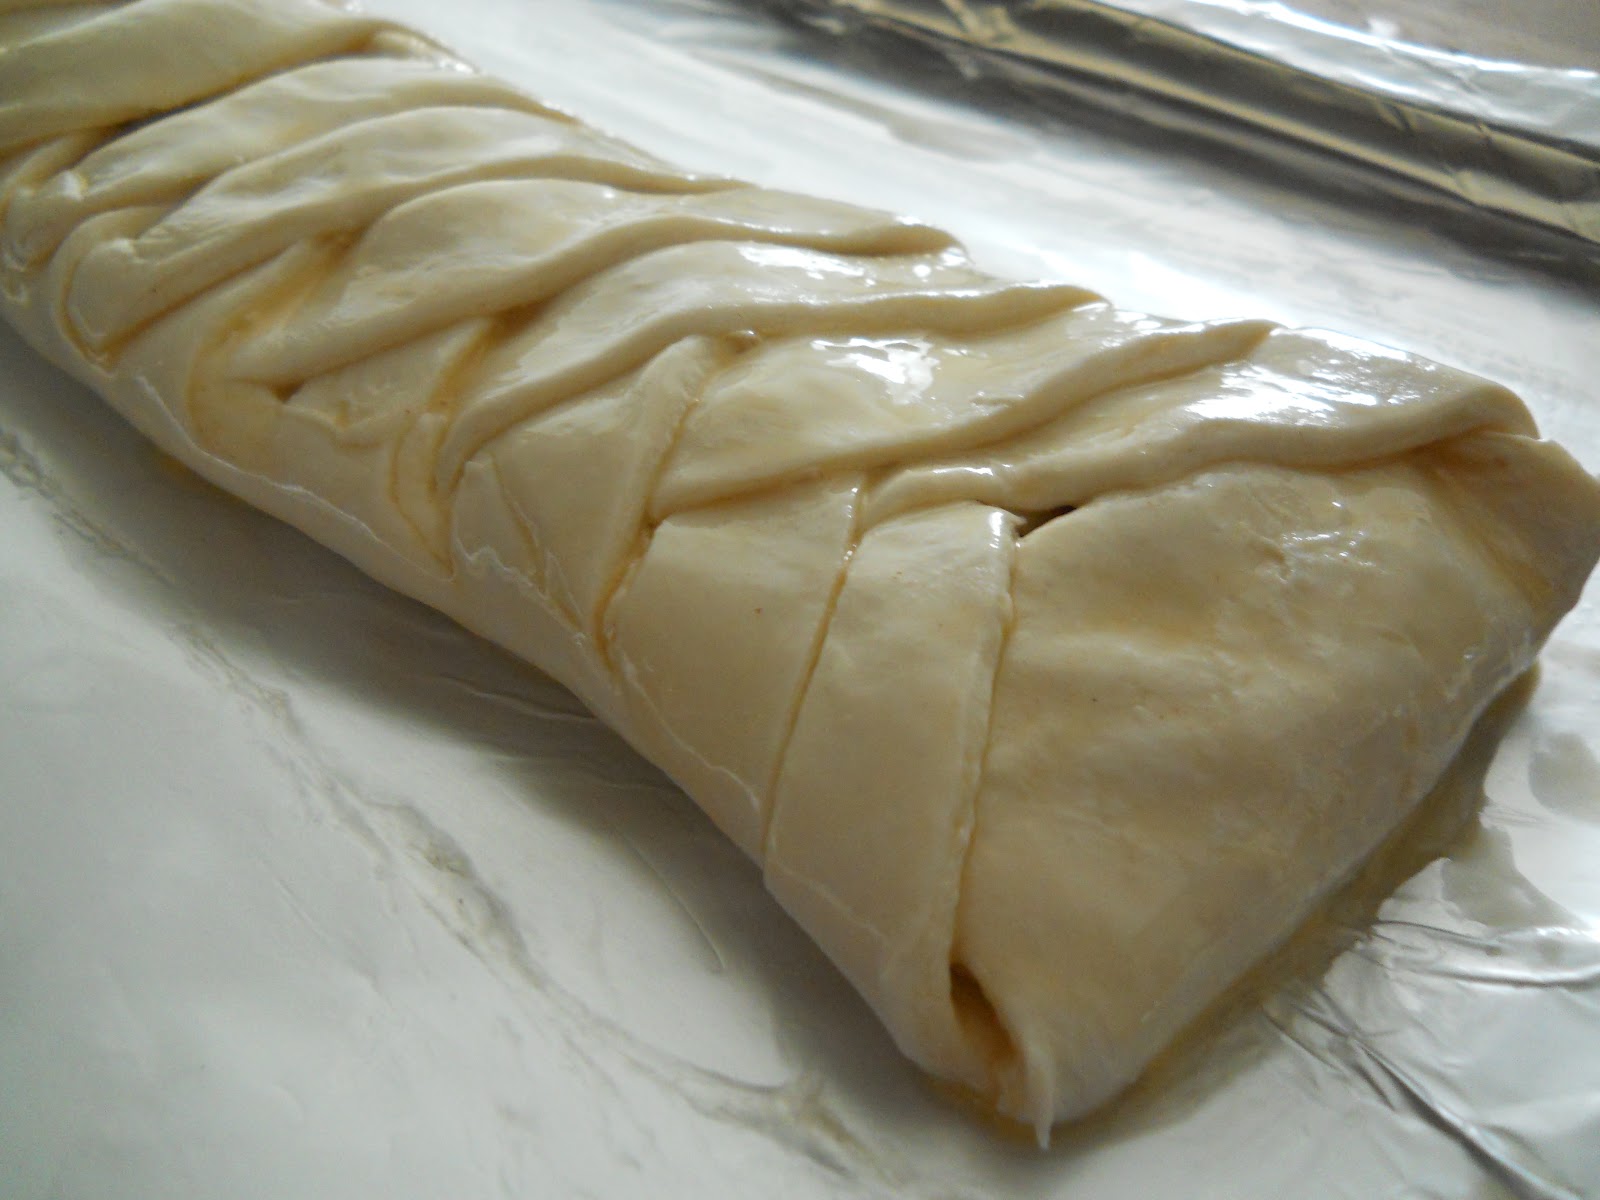
4. Preheat the oven to 375F/190C. Remove the pastry dough from the fridge. On a lightly floured surface, roll out the pastry to 1/8″ thick. Cut dough with a large lid or coffee can into 4in or 6in diameter circles. I got 8 empanadas out of this. 4 for dinner, 4 for the freezer :)

I used a teacup saucer to measure

5. Put about 2 tablespoons of filling into the center of each empanada. Fold the dough over each other, making a semicircle, and press the edges with a fork to fully enclose the filling.


6. If making ahead, wrap tightly in plastic wrap and keep refrigerated up to 2 days. When ready to bake: brush with an egg wash or milk. Bake the empanadas for 15-20 minutes or until golden brown. Keep in the oven to warm.

Sauce and Egg

1/2 onion, diced
1 green chili, chopped
1/4 tsp cumin
1/2 tsp salt
2 small tomatoes chopped or 1/2 can chopped tomatoes

1. Clean out the same saute pan. Drizzle a little oil and add onions and chilies; softening the onions on medium heat. Once translucent, add the tomatoes and the juice the tomatoes are packed in. If you are using fresh tomatoes, chop them first, then add. Note: that fresh tomatoes will take longer to cook as canned tomatoes are already cooked to begin with. Add cumin and salt, bring to a simmer, reduce heat to low, and let simmer for 10 minutes. Add salt to taste if needed.

2. Crack 4 eggs slowly on top of the sauce. Cover with a lid and let cook for 3-5 minutes or until whites are cooked and yolk is set (I like mine a little runny, like poached eggs).


start


finished


To Serve

On a plate, place 1-2 warm empanadas. Top with sauce and one egg. Garnish with fresh coriander leaves, salt and pepper.

Calories calculated using Sparkrecipes Calculator: 545.2 calories per serving

Saturday, July 14, 2012

Quick Apple Cheese Danish

I made this danish on a whim after craving something sweet that would also use up my purchase of too many apples and puff pastry. Result of my whim? LOVE! I simply love this recipe over and over again. I have made this danish about four times now in the last two months. It's addicting. REALLY addicting. 

If you love: Lemon, Cheese, Apples, Cinnamon, or Pastry, this danish will hit the spot in a fraction of the time it would take to make a complicated old fashioned one. 

As for the 'cheese' part of this danish, there are two kinds hidden in here, cream cheese and cheddar. I got the idea of adding the cheddar because I recently heard some people love a slice of apple pie with melted cheddar cheese on top! This is not 'cheesy' in that way, but sweet and tart from the baked apples and lemon. 


Quick Apple Cheese Danish                                   Makes 8 slices
                                                                                            
1/2 package of puff pastry (8oz/250g)
1/2 c cream cheese
1 whole lemon, small
4 tbl granulated sugar
1-2 apples, any kind-the more tart, the better
2 oz? cheddar cheese (I measured by eye and used a piece the size of my thumb, thus the '?')
1/4 tsp ground cinnamon + a dash
1/8 tsp ground nutmeg + a dash
salt
1 tbl white flour for dusting
1 egg

1.  Pre heat the oven to 420F or 220C OR whatever your Puff Pastry Package says to bake at! Line a cookie sheet with parchment paper or foil. Take out your puff pastry out of the refrigerator and leave on the counter to soften while you make the filling.

Put 1/2 cup of cream cheese in a bowl, mix in 2 tbl of sugar, and zest of entire lemon. Cut lemon and add juice of one half, save the other half for later. Grate the cheddar cheese and join with the cream cheese, add a dash of cinnamon and nutmeg. Combine until mixture is creamy and soft. Salt to taste.


 2. Cut your apples in half and core; I like to cut a 'V' shape out, it's quickest. Then peel the skin and slice to make arches, rainbows, semi-circle, crescents, etc...  I do not recommend you peel first then core, as the apple will be slippery and you may hurt yourself.


3. Place slices in a container, cover with remaining 2 tbl of sugar, cinnamon and nutmeg. Mix and set aside. You can add the juice of the other half of your lemon if you want. Set aside.


4. Sprinkle flour on the work space and roll out puff pastry into a roughly 15x10 rectangle. I rolled my puff pastry the length of my cookie sheet and then as wide as it would go. I mean, you're smart people, you can figure it out without using a ruler. Just eyeball it. Don't make it complicated.


5. Using your thumb, start from the side and mark in on the left then right, measure down and mark on both sides of the pastry, cut a diagonal obtuse angle and remove. I scored a little to make my angles as even as possible. You want to end up with sort of a head in the center.


Then using your thumb again for measurement, cut diagonal lines all the way down the pastry. You can cut off the tips of longer braids, but that is just wasteful and the pastry looks good no matter what.


6. Carefully spread your filling down the middle of the pastry and layer the apple slices on top.


Now, Braid! 
Fold down the top pastry flap, then fold one side over the filling, alternating each side to make a pretty braid.


7. Move your danish carefully to your prepared pan. Mix an egg and give the whole thing an egg wash to make it golden brown. Bake 20-25 minutes.


8. Enjoy warm for breakfast or as dessert with a scoop of vanilla ice cream on the side.


Calories calculated using Sparkrecipes Calculator: 282 calories per slice

Tuesday, November 29, 2011

Vegetable Stuffed Shells

In the mood for some creamy cheese filled carb boats? Me too!

But I HAVE to make the standard stuffed shells recipe a bit more healthy. This is normally considered an "easy weeknight, everynight" dish. But come on? Who's waistline can afford that much gooey goodness all the time?

Which means, make the most of your vitamins and watch your serving size and there should be no guilt on a normally considered indulgent dish. 


Bring on the Veggies!

Vegetable Stuffed Shells                         Serves 4

16-18 Jumbo pasta shells (wheat is best)
2 cloves of garlic, minced
1 zucchini, shredded about 1 1/2 c
1/2 c yellow onion, diced
1 {2 lb} bunch of fresh spinach, roughly chopped
1 small carrot, finely shredded
1 1/2 c part skim ricotta cheese
1/2 c Asiago cheese, shredded
1 egg
1 tsp salt
1/2 tsp pepper

1 c mozzarella cheese, shredded
1/2 jar marinara sauce or 1 1/2 c homemade pasta sauce

1. Cook pasta shells according to the package directions. Drain and set aside when done. Meanwhile start your filling.

2. In a medium saucepan add a little bit of oil. Sautee garlic for 1 minute or until aromatic. Add onions and sautee another minute. Add carrots an zucchini and sautee until tender and all water is evaporated out of the pan. Add spinach and sautee until wilted.

3. Pre-heat oven to 350F. Transfer veggies to a large bowl, combine with the rest of the ingredients (ricotta-pepper). Lay out a shallow roasting pan, spread 1/2 c of sauce on the bottom of the pan. Stuff your shells and place in the pan.


4. Drizzle 1/2 c marinara sauce over the shells and sprinkle 1/4 c mozzarella cheese on top. Cover with the lid or aluminum foil, bake for 30 minutes.


5. Enjoy!

Note: I noticed the zucchini was deviously hidden in these shells. If you have a child that hates green things (like mine), peel the zucchini and omit the spinach.

Calories calculated using Sparkrecipes Calculator: 460 calories for 4 shells

Monday, November 14, 2011

Fajita Quesadilla

I can't underestimate how many times a week I could eat quesadillas, or overestimate how much I love eating them.

The simple quesadilla is my favorite food. It's fast, it's cheap, and so easy to make. Did I mention delicious? That should be the number 1 reason for eating anything!


This is the fajita quesadilla. I'm sure many people know how to make melted cheese between a tortilla. Really, that is like kindergarden type of meals.

But for those who want a delicious, step up the lunch scale kind of quesadilla, definitely try this next time.

I also want to add, this is a total party food. Its a definite crowd pleaser and can be easily made ahead and kept warm in the oven. Yum!


Fajita Quesadilla                                 Serves 4

4 large flour tortillas
3 tbl butter
2 cups 1% mozzarella cheese
1/2 red bell pepper, sliced into 1" strips
1/2 green bell pepper, sliced into 1" strips
1/4 large yellow onion, diced
1/4 cup chicken pieces (perhaps from a leftover whole chicken?)

1. In a small pan, melt 1 tablespoon of butter and sautee vegetables until tender, add chicken and cook until heated through.


2. In a large skillet, heat to medium. Butter one side of your tortillas and place in the skillet, butter side down. Fill one side of the tortilla with half the cheese and sauteed vegetable mix. Top with a little more cheese if desired.

This is my 2nd quesadilla, you can see the 1st one under the top one.

Fold over other side of the tortilla. If you are making two and have enough room, butter and add your tortilla repeating the steps to fill, and fold. Cover with a lid and let cook for 2 mins.


3. Remove the lid, with tongs flip the quesadillas, recover and cook an additional 1-2 mins. Move to a cutting board and let sit for 1-2 mins to let cheese settle.


4. Slice into triangles and serve with sour cream and salsa for dipping.

Calories calculated using Sparkrecipes Calculator: 348 calories per serving

Saturday, November 5, 2011

Pumpkin and Spinach Lasagna

Another Pumpkin recipe I haven't tried yet: Pumpkin Lasagna. It's a well known dish, but I always was apprehensive to try it because to my pumpkin is a sweet food, not a savory food.

But with such a popular recipe I knew if I took a crack at it, my taste buds wouldn't be taking such a big risk into the new realm of pumpkin use.

I looked at a few recipes from a lot of blogs and websites, foodies and celebrities all have their own versions of this dish. So I went with something simple, used the ingredients I had on hand already, and was as close to classic lasagna as possible, while still staying veggie.

So here is what I came up with. If this recipe is close to YOUR recipe, I apologize, but there were far to many recipes to research to confirm that mine was an original.

In the end I was quite surprised at the flavor combination. I loved the creaminess of the cheese, the pumpkin and spinach together were amazing, and the noodles brought it all together into a happy marriage of flavors.


Pumpkin and Spinach Lasagna

Sauce

5 Tbl butter
1 yellow onion, minced
5 garlic cloves, minced
1/4 c flour
3 1/2 c milk
1 tsp nutmeg
1/2 tsp ginger
pinch turmeric
salt and pepper to taste

1. Melt butter in a medium saucepan, and sautee onions and garlic until soft. Stir in flour and mix well. The mix will be a bit sticky, but try not to brown the flour or it will leave a burned taste to the sauce.

2. Whisk milk in slowly and bring to a boil, stir in spices. Reduce heat to low and stir slightly until sauce thickens.

Lasagna

1 c Mozzarella cheese, shredded
15 oz container ricotta cheese
3 c pure pumpkin puree
1 egg
1 9oz box No Boil lasagna noodles (or regular lasagna noodles)
1 bunch fresh spinach, chopped
4 oz Parmesan cheese
salt and pepper to taste

1. In a medium bowl, combine ricotta, pumpkin and egg. Salt and pepper again if desired. Pumpkin is bland if left alone.

2. Spray a 13x9 inch baking pan with release spray. Pour a cup of sauce and spread on the bottom of the pan. Layer 4 sheets of noodles.


3. Spread ricotta mix carefully over noodles, followed by 1/4 of the spinach, 1/4 mozzarella cheese and 1/4 Parmesan cheese. Continue to layer noodles, ricotta mix, spinach, and cheese until you have 4-5 layers.


4. Top with remaining sauce, spinach and cheeses. Cover with parchment paper and aluminum foil. Bake 40 mins, then remove foil and parchment and continue to bake until cheeses are melted and slightly brown.


5. Cool about 15mins before serving to allow lasagna to set up. Serve with a fresh side salad.
Beautiful bites
lasagna with pepper on top made it even better


Calories calculated using Sparkrecipes calculator. 329 calories per serving

Tuesday, October 25, 2011

Lentil Stuffed Bell Peppers

So let's talk healthy.... Everyone knows they need to add more fiber, good proteins, and vitamins into their diet and simple changes can help achieve those goals. 

Take a classic yummy dish like stuffed bell peppers. Swap rice and meat for nutritious and hearty lentils, pack it full of veggies and you got a winning meal.

These bell peppers are yummy, filling and best of all *healthy*!


Lentil Stuffed Bell Peppers

1 c dry green lentils
6 c water
1 jalapeno, chopped
1 pinch chili powder
1 pinch turmeric powder
1 tsp salt
1 tsp pepper
2 tbl olive oil
1 tbl coriander, powder
1 yellow onion, chopped
4 garlic cloves, minced
1 inch ginger root, minced
1 lb bunch spinach, chopped
1/2 tomato, chopped
2 red bell peppers
2 yellow bell peppers
mozzarella cheese (Optional)
Lime wedges (Optional)


1. Mix water, lentils, chili powder, jalapeno and turmeric in a medium pot. Boil lentils for 30 mins on low simmer until lentils are tender. Drain and pour into a deep mixing bowl.

2. Rinse out pot and fill with water. Boil water and submerge peppers for 3-5 mins. Remove peppers, stem and remove seeds inside. Slice sideways if too large to stand up on their own and place in a foil lined, shallow roasting pan. In the meantime, begin stuffing.

3. Preheat oven to 350F. Take out a heavy saucepan and cook cumin on medium heat until it pops. Cook onion, garlic and ginger until tender (not brown). Sautee tomato for 3 mins or until soft. Add coriander and mix well, cook an additional 5 mins. Add spinach and stir occasionally until wilted. Mix with lentils.

4. Fill each pepper with lentil stuffing and return back to pan. Bake for 12 mins. Open oven and sprinkle with mozzarella cheese, and bake another 3 mins or until cheese is melted.

5. Serve hot, garnish with lime wedges.

Calories calculated with SparkRecipes Calculator: 99.9 calories per serving. Check out the loads of vitamins you will get! Yum!


* If you have leftover lentils, I mix in a little taco seasonings and have tacos for lunch tomorrow!

Saturday, October 22, 2011

Creamy Cauliflower Casserole

This recipe was made up as I went. Starting with a craving for cauliflower and something to warm my tummy.

Sorry about the pictures. This casserole may not be pretty (the tomatoes give it a wierd beige-rust color), but it sure is good.


Creamy Cauliflower Casserole          Serves 8-10

Sauce
1c heavy whipping cream
1 c chicken broth
1/4 c white wine
1/4 c Asiago cheese, shredded
1 c sun dried tomatoes, not packed in oil, julienne cut
2 tbl cornstarch with equal parts water mixed

Casserole
1 Medium Cauliflower, cut into florets
2 c Farfalle Tricolore (any GOOD tri colored pasta with semolina)
2 tbl butter
1/2 red onion, diced
1 c mushrooms, sliced
1 tsp crushed red pepper, dried
4 garlic cloves, large, minced
1 inch ginger, fresh, minced
1 lb chicken, cooked and shredded (Optional)
salt and pepper to taste

1. In a small saucepan over medium heat, cook cream until just bubbling, don't boil over. Stir in broth, wine and Asiago cheese. Stir until dissolved. Add cornstarch mixture, and simmer until sauce is thickened, stirring constantly. Mix in the sun-dried tomatoes. Set aside.
               
2. Bring a large pot of lightly salted water to a boil. Add pasta and cook for 5 minutes; add chopped cauliflower to the pot to cook together. Cook another 10 minutes; drain.

3. In another large saucepan over medium heat, melt butter. Saute red onion and mushrooms until soft. Stir in garlic, ginger and spices; cook for 2 minutes. (I wish I thought of it before, but spinach would be wonderful in this, mix in now if you want.) Stir in chicken, toss with spices and cook another 5 mins. Add Asiago cream sauce, and heat through.

4. Pour cauliflower and pasta in a 2 1/2 quart casserole dish. Toss with Asiago sauce until evenly coated. Sprinkle with more shredded Asiago cheese and chopped parsley. OR top with bread crumbs tossed with some melted butter, more Asiago cheese and heat in oven for another 10 mins until crunchy and golden brown.

Calories calculated using SparkRecipes: 393 calories per serving


Friday, October 14, 2011

Homemade Paneer

Continuing with my Indian cuisine curiosity, I was kind of interested in paneer. The stuff seemed to be every dish, what is that stuff? Now, mind you, I have never even eaten at an Indian restaurant, so I am finding these things out all on my own.

Paneer is a fresh cheese that doesn't require aging and doesn't melt! Reminds me of Mexican Queso Blanco (yum!), Now that I'm familiar with.

Apparently, Paneer...is very common and so simple, that I figured I could make this stuff at home. Looking for a recipe, I did short research and you only need two ingredients! What? A protein substitute with two ingredients?

Fabulous!

I made my paneer today and will use it tomorrow, recipe to follow!

Also, if you haven't noticed on my blog, I have taken the October Unprocessed Pledge. I pledged to not prepare any meals with processed foods. Check it out here and take the pledge too, it's never too late!

Here we go...

Paneer            Serves: 2

8 c whole, 2% or 1% milk (higher milk fat means more curds)
Juice from one lemon or lime (2 tbl)

Tools:
Sauce pan AND heavy bottomed pan
thin clean cloth or cheesecloth
tall pitcher or bowl
wooden spoon


1. Grab a wide, big pot and pour in your milk. Heat until hot, but not boiling.


2. Add your juice and stir just a little, you should see right away some curdling (that means the acid is working). Let milk continue to cook on med for about 10 mins. Don't over stir your milk, just check it every few mins to move your curds to the side.

3. Once the curds separate from the whey (the liquid remaining after milk has been curdled), the whey should turn a slightly green tinged color.

I was surprised how little cheese you get out 4 cups of milk! But again, you just want the curds, the milk fat for your cheese.

4. Place your cloth/cheesecloth in a colander or bowl, making sure corners are hanging over the edges; pour curds and whey into cheesecloth. Grab corners and tie together. Lift and let hang inside a pitcher to drain about 5 mins, press out whey.


5. Move your paneer and place on a flat surface, place a heavy bottomed pan on top and let sit for another 5-10mins. This will help set the cheese to stay firm so you can slice or cube it later. If needed, squeeze any more remaining whey.

I had to squeeze more out

6. Mine made about 1-2 cups. Refrigerate until needed or just enjoy.


Servings: You can fry it, kabob it, bake it, eat it fresh, crumble it on top of dishes, salads...this cheese works hard to be useful, frugal and good for you!

To many, this cheese is a lot like Greek feta. If you hate feta (Like I DO): because it's bitter and just gross; you will like Paneer. It's neutral and reminds me somewhat of tofu, just waiting to soak up flavors of any dish you add it too.