Saturday, July 21, 2012

Eggplant Rice

This is a simply simple recipe to mix up your regular rice routine.

I have become a really big fan of eggplant recently now that I know how to use it. Before it was this scary purple vegetable (which was strange in itself) that no one I knew would eat regularly. Now I buy 2-3 every shopping trip, I can't imagine not eating them!

The eggplant cooks down into a sort of tender blob that tastes perfect with the flavorful rice.

Added bonus- it's a sneaky way to eat your veggies.


Eggplant Rice                                                 Serves 4

Rice

1 c Basmati rice
1 1/2 c water
salt to taste

Eggplant mixture

1 tbl oil
1 tsp mustard seeds
2 cloves
3 green chilies, chopped
1 red onion, chopped
1 tsp garlic paste
1 tsp ginger paste
1 tomato, chopped
1 American eggplant, diced into cubes
1 tsp chili powder
1/8 tsp turmeric powder
1/8 tsp nutmeg, ground
2 tsp coriander powder
salt to taste
coriander/cilantro leaves (garnish)

1. Cook the rice in the microwave on med-med/high for 15-18 minutes or until all the water is absorbed. meanwhile make the eggplant mixture.
2. In a saucepan over medium heat, heat the oil then add the mustard seeds and cloves. Let them heat up until they pop and you can smell their aromas. Add the onions and chilies, fry until onions are soft and slightly pink in color.
3. Mix in the garlic and ginger paste, cook for another minute stirring occasionally.
4. Add the remaining spices, tomato and eggplant to the pan, mix well and cover with a lid. Let vegetables cook, stirring occasionally until eggplant is soft and tomato has broken down.
5. Add the cooked rice to the pan, mix to combine evenly, cover with the lid. Keep rice hot in the pan until ready to serve.
6. Garnish with fresh coriander/cilantro leaves if desired.

Calories calculated using Sparkrecipes Calculator: 104.7 calories per 1 cup serving


Sunday, July 15, 2012

Leek and Chickpea Curry

I have never had leeks before. I bought them just for that fact. 

If YOU have never had leeks before, then I think you will be pleasantly surprised at their taste and, in this curry. You never can go wrong making a curry out of the vegetables you have on hand.

The flavors meld. They compliment.

If you are thinking 'curry,' that must be spicy! It's only as spicy as you want it to be. I like things with a good kick, but also have deep flavors that keep your tongue busy with each bite as it recognizes all the spices you add. A curry combines these two food loves in one.

Curry doesn't mean just spicy. It means a lot of things. But, as it was explained to me, curry usually is defined as anything cooked with water. Read this interesting wiki definition if you want to get some more ideas. Think about it this way. If you like to curl up with a warm bowl of soup on a chilly day, a curry gives you just that.

This will be my first of many curries I hope to post on this blog. I won't post about regular curries; that you can Google, but the ones I put my own spin on.


Leek and Chickpea Curry                                        serves 4


2 tbl vegetable oil or ghee
1 onion, diced
3 cloves garlic, chopped
1 in ginger, peeled and chopped
2 leeks, trimmed. Here is a helpful video how to prepare leeks for us beginners
2 c cooked chickpeas, 1 can
1 medium potato, peeled and cubed
1 tsp EACH ground cumin, ground coriander, salt, garam masala, tumeric
1 tbl EACH chili powder, Kitchen King (available in Indian, Punjabi, Pakistani stores)- KK is optional
1/2 can chopped tomatoes
1/2 can coconut milk
water 
coriander/cilantro, fresh, chopped

1. In a saute pan, heat the oil and on low saute onion, garlic, ginger and leeks for 5 minutes, letting leeks and onions sweat.
2. When leeks and onions are tender, add all the spices listed, mix well and let cook another 5 minutes.
3. Add chopped potato, tomatoes, coconut milk and one cup of water. Mix well. Bring to a boil and let simmer on low for 30 minutes, stirring occasionally and adding more water if necessary.
4. Garnish with fresh coriander, serve with wheat tortillas, wheat pita bread or rice.

Calories calculated with Sparkrecipes calculator: 241 calories per serving. *Does not include calories of anything served alongside (tortilla/rice)


Saturday, July 14, 2012

Quick Apple Cheese Danish

I made this danish on a whim after craving something sweet that would also use up my purchase of too many apples and puff pastry. Result of my whim? LOVE! I simply love this recipe over and over again. I have made this danish about four times now in the last two months. It's addicting. REALLY addicting. 

If you love: Lemon, Cheese, Apples, Cinnamon, or Pastry, this danish will hit the spot in a fraction of the time it would take to make a complicated old fashioned one. 

As for the 'cheese' part of this danish, there are two kinds hidden in here, cream cheese and cheddar. I got the idea of adding the cheddar because I recently heard some people love a slice of apple pie with melted cheddar cheese on top! This is not 'cheesy' in that way, but sweet and tart from the baked apples and lemon. 


Quick Apple Cheese Danish                                   Makes 8 slices
                                                                                            
1/2 package of puff pastry (8oz/250g)
1/2 c cream cheese
1 whole lemon, small
4 tbl granulated sugar
1-2 apples, any kind-the more tart, the better
2 oz? cheddar cheese (I measured by eye and used a piece the size of my thumb, thus the '?')
1/4 tsp ground cinnamon + a dash
1/8 tsp ground nutmeg + a dash
salt
1 tbl white flour for dusting
1 egg

1.  Pre heat the oven to 420F or 220C OR whatever your Puff Pastry Package says to bake at! Line a cookie sheet with parchment paper or foil. Take out your puff pastry out of the refrigerator and leave on the counter to soften while you make the filling.

Put 1/2 cup of cream cheese in a bowl, mix in 2 tbl of sugar, and zest of entire lemon. Cut lemon and add juice of one half, save the other half for later. Grate the cheddar cheese and join with the cream cheese, add a dash of cinnamon and nutmeg. Combine until mixture is creamy and soft. Salt to taste.


 2. Cut your apples in half and core; I like to cut a 'V' shape out, it's quickest. Then peel the skin and slice to make arches, rainbows, semi-circle, crescents, etc...  I do not recommend you peel first then core, as the apple will be slippery and you may hurt yourself.


3. Place slices in a container, cover with remaining 2 tbl of sugar, cinnamon and nutmeg. Mix and set aside. You can add the juice of the other half of your lemon if you want. Set aside.


4. Sprinkle flour on the work space and roll out puff pastry into a roughly 15x10 rectangle. I rolled my puff pastry the length of my cookie sheet and then as wide as it would go. I mean, you're smart people, you can figure it out without using a ruler. Just eyeball it. Don't make it complicated.


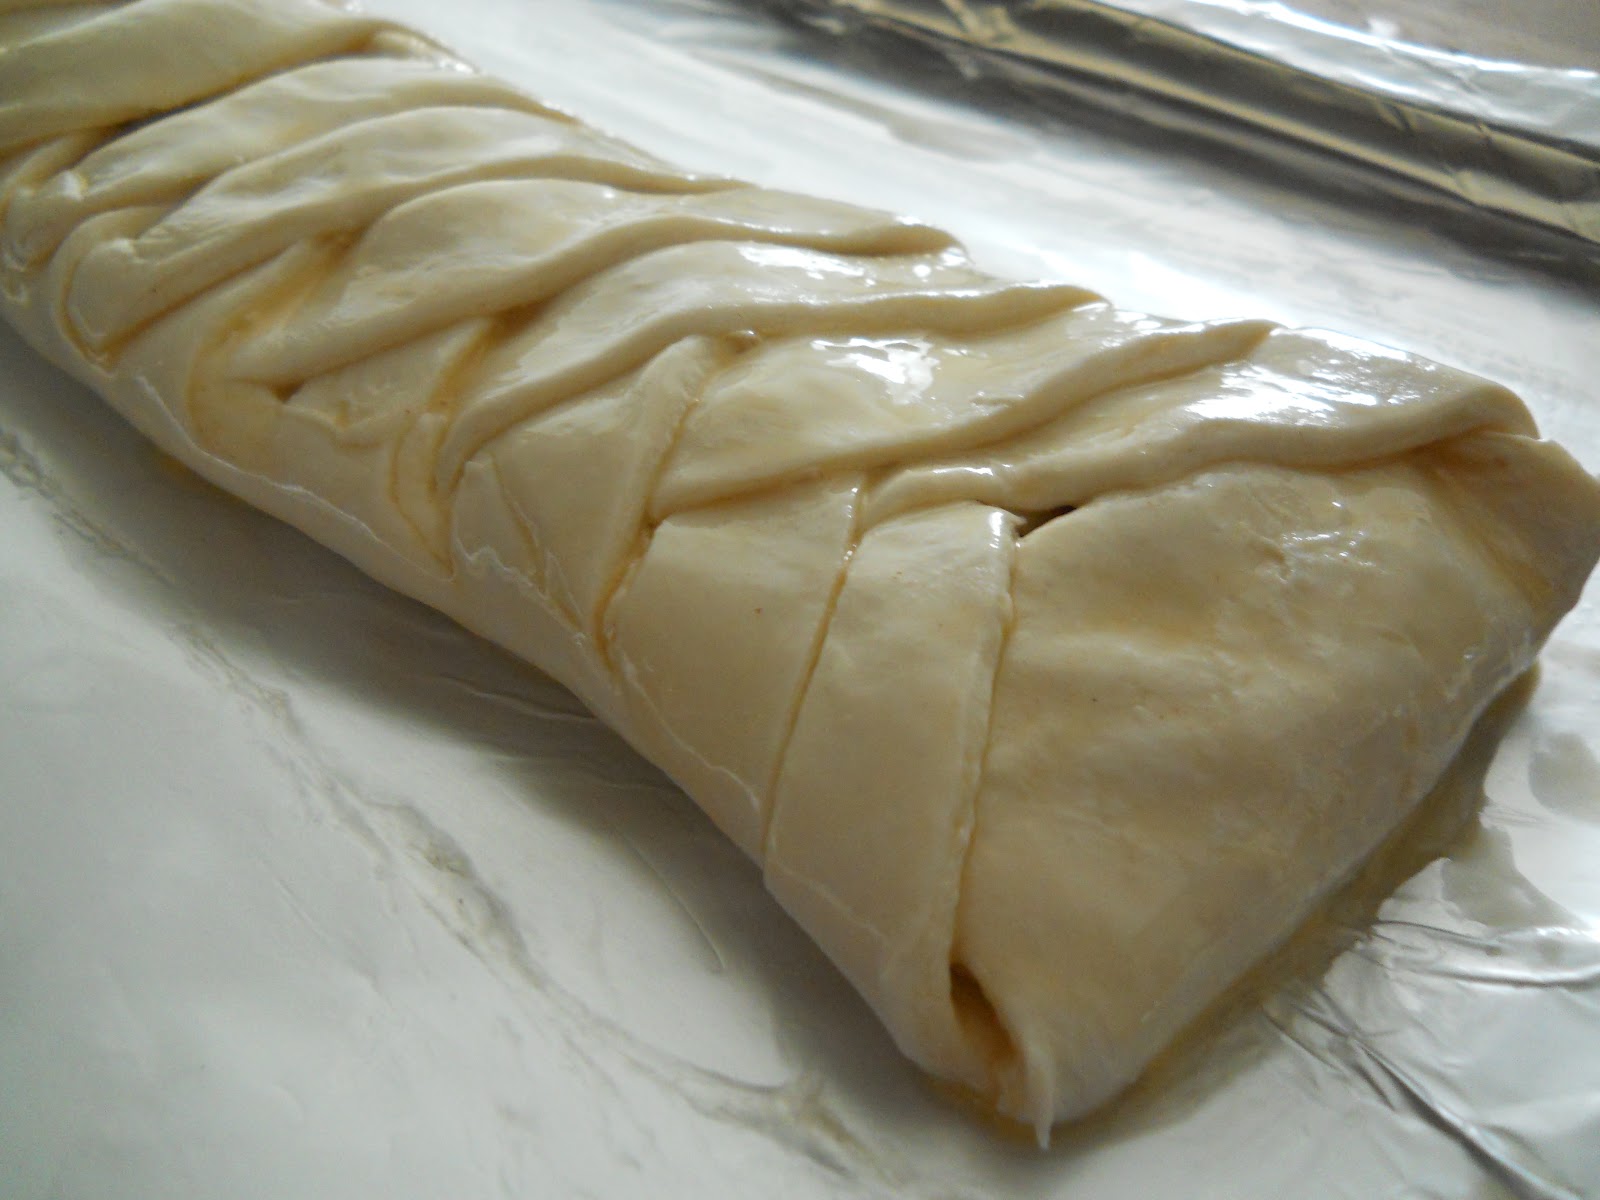
5. Using your thumb, start from the side and mark in on the left then right, measure down and mark on both sides of the pastry, cut a diagonal obtuse angle and remove. I scored a little to make my angles as even as possible. You want to end up with sort of a head in the center.


Then using your thumb again for measurement, cut diagonal lines all the way down the pastry. You can cut off the tips of longer braids, but that is just wasteful and the pastry looks good no matter what.


6. Carefully spread your filling down the middle of the pastry and layer the apple slices on top.


Now, Braid! 
Fold down the top pastry flap, then fold one side over the filling, alternating each side to make a pretty braid.


7. Move your danish carefully to your prepared pan. Mix an egg and give the whole thing an egg wash to make it golden brown. Bake 20-25 minutes.


8. Enjoy warm for breakfast or as dessert with a scoop of vanilla ice cream on the side.


Calories calculated using Sparkrecipes Calculator: 282 calories per slice